Showing posts with label bridal shower. Show all posts

Monday, 11 November 2013

Bridal Shower Cupcakes ♥

I am super happy today to be blogging about 52 cupcakes I made this weekend for a special lady's bridal shower yesterday!  I'm a little late with the post, but was busy busy making and decorating these cupcakes, and then of course celebrating at the shower itself ♥
 
 
 But here it is, and I'm so happy with how they all turned out!
 
I was asked by my friend (sister and maid of honour to the bride) to make cupcakes for the brunch which would be a vintage, tea party type brunch at an amazing venue - perfect for this shower.  She and the other bridesmaids did an amazing job putting together all of the decorations, games and food which made it a really, really pretty and fun bridal shower!  I think the bride-to-be had a great time!
  
Mostly I am so happy to be asked to make these for the shower.  It is the first time I have had the chance to bake SO many cupcakes for one event and was given a little inspiration from this picture which the sister and maid-of-honour showed me, giving me the idea of how the event would look and the ideas that they were having!
Cupcakes in Lace
So of course, I got to work in my brain, planning out lots of different ideas, thinking about how I could make this work - in a Sew Lah Tea Dough way!  I didn't want to fully recreate these cupcakes, but instead, put a personal spin on these as well as matching the bride, the party itself and everything I could to tie in my cupcakes to the shower.
 
The bridesmaids had made some really amazing brown paper invitations with ribbon and button embellishments, so that was a personal inspiration that I knew would be used in the shower itself. 
 
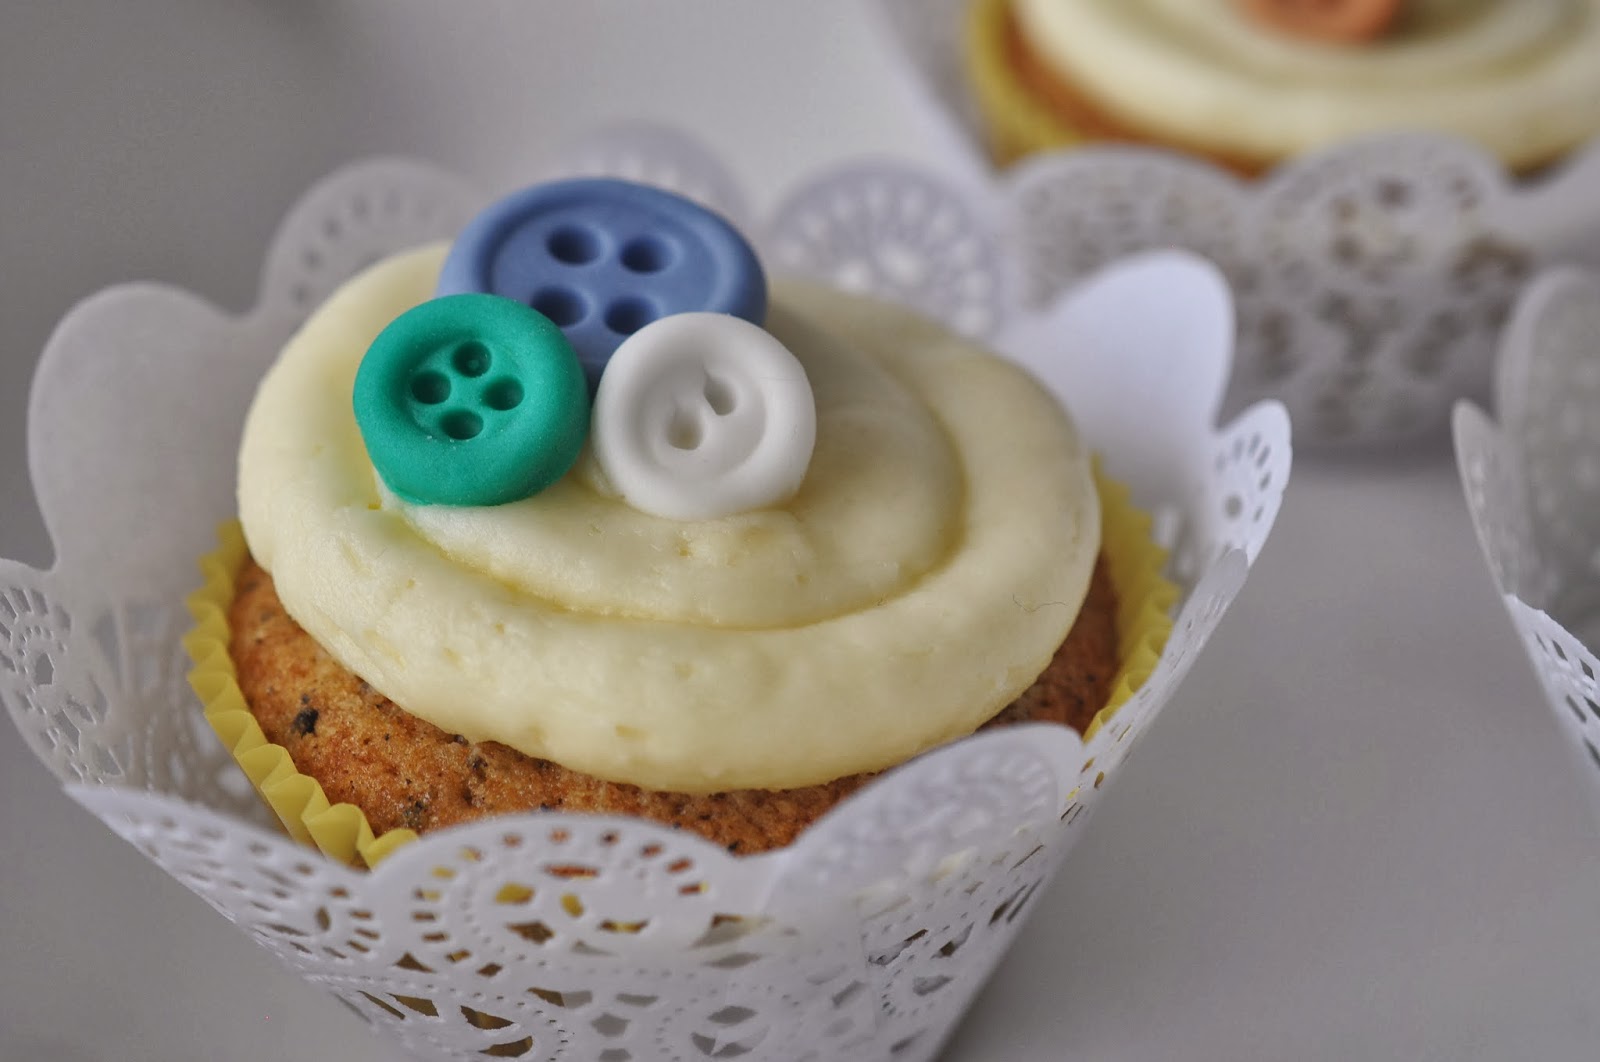
So two different designs were born... 1, a pretty in pink look with similar tags stuck in, with lace and pearl inspirations.  2, a button inspired vintage feel design.


At the family Summer bash in July I made this cake - a nautical themed Earl Grey Tea cake with Orange Buttercream.  This flavour was a hit with young and old and so this was the requested flavour for the bridal shower too :)  Super happy to get the chance to make this cake again but I changed it up just a little bit.  But how perfect, a tea flavoured cake for a Sunday Bridal Shower Brunch with pretty tea cups and saucers!  I chose to do a lemon buttercream this time to match the citrus flavours you can taste in Earl Grey tea.  I chose orange buttercream last time to tie the earl grey to the marzipan to the buttercream but this time there would be no marzipan, only the cake, fondant decorations on top of the buttercream, so I chose a slightly different flavour.  (Just happens to be my favourite hehe!).

Now you know the inspiration for the designs, and the flavour it's time for the photos :-)

Fondant day was first!  I wanted to get the cupcake decorations made and ready so that on baking day they would have hardened up, meaning they (hopefully) wouldn't go soft once they were placed on the buttercream.  (*It worked!*) ... and it also meant that they were made and done ahead of time, giving me the afternoon before the party to really work on getting them baked and decorated already knowing what would be placed on top ... all I had to decide was the colour combinations.

Here are my supplies for fondant day!  I was excited to use my new Wilton fabric silicone mould which included great button shapes.  I coloured the fondant with a variety of colours, some bright, some more muted, generally going for blues, teals, browns, purples and pinks trying to match the vintagey-feel.  I also used my heart punch for some little love accents which I used on a few of the cupcakes.


I really LOVE working with fondant, creating new shapes, colours and generally just playing around with it all :-)

And for the other design I had been busy working during the week before to create the tags to go on top of the pretty in pink pearl cupcake. 


I used the 'Love Letter TW' - typewriter font and printed out various text on pink card stock that I would use to cut out with my tag cutter!  I chose to use 'I do', 'bride-to-be', 'love' and 'l&r' (the bride and groom's initials).  I also cut out brown paper tags in the same size that I would back the pink ones with.

I used a toothpick in the middle, and glued the two together.  I also then used stick on pearls to decorate the tags.  I had edible pearls for the cakes so thought this would match well. 

 
Fondant toppers made and drying out... Tags all put together... Doilies cut and made to make the lace-look cupcake wrappers and I was ready to...... BAKE!


52 cupcakes were baked, and I had bought 2 huge cupcake boxes from the amazing Golda's Kitchen which would fit 48 (so I guess that left over a few for the boys happily watching football until clean up time :-P).

I used almost the same recipe as last time I baked these cupcakes and so you can find the step-by-step picture tutorial there, but I've also included the recipe at the end of this post - it is so delicious, hope you get to try it!

I used a 1A large open decorating tip for the button cupcakes which I decorated first.  I wanted to make sure the colour combinations were working and they would sit well on the buttercream before the evening got too late!  I chose to use three buttons on each in complementing colours.  Here they are - feeling happy at least half of the cupcakes had worked out and looked good!


Next up was a 1M star tip for a swirl of peach coloured buttercream, three edible pearls dropped into the swirl and then the tag stuck in the middle.  I LOVE how the doily cupcake wrap matched the pink pearl feel and can't wait to make more cupcakes that will need a pretty lacey doily wrap :)
 

By the end of the night, I was tired and hungry so there's a lack of pictures here, but I knew I had to wait for daylight to get some good photos of the cupcakes so I packed them away for the night!


Until the morning... photo shoot time ♥


Lacey love cupcakes photographed and back in their box...

 
Time for the buttons! 


Everything packed up ... 2 huge boxes full of cupcakes!  Time for a quick drive up to the shower keeping fingers crossed that no sudden stops had to be made!  It was the first time transporting so many, so I got scared and sat in the back seat with them... All was good (*phew*) and they arrived at the PRETTY bridal shower!  There were some really beautiful platters to put them on, and they sat beside scones, sandwiches, croissants, yummy quiche, kringel, other sweets and an awesome donut tower!
 
So happy to be a part of this special bridal shower ♥  Can't wait for the big day!


* Keep reading for the recipe below *
 
 
For the cake... I'll give you a recipe that will make 16 normal sized cupcakes.  I don't think everyone making this will always want to do 52!

Ingredients:

1/2 cup unsalted buter
1 cup sugar
1 1/2 cup flour
2 1/4 baking powder
1/2 tsp salt
2 eggs
1/2 cup whole milk
3 tbsp loose Earl Grey tea

Method:

1.  Preheat oven to 350°F and line cupcake tray with cupcake cases.
2.  Grind the loose leaf tea (using coffee grinder, food processor or by hand) until it is in smaller pieces, but not quite a powder. 
3.  In a small saucepan heat the milk and 1 tbsp of the ground tea - warm slightly.
4.  Remove the saucepan from the heat before it simmers and let it cool, allowing the tea to steep.
5.  While the milk cools, cream the butter and sugar together in a mixer until it is light and fluffy.
6.  Add the eggs one at a time, mixing well between each one.
7.  In a bowl, mix together the flour, baking powder, salt and rest of the tea.
8.  Add half of the dry mixture to the batter and stir until combined.
9.  Strain the milk from the saucepan (leaving the loose steeped tea) and add to the mixture.
10.  Add the remaining dry mixture and mix until all combined. 
11.  Divide the batter between the cupcake cases - I found that using a small OXO cookie scoop it took 3 scoops to make a perfect size of cupcake, just to a similar height as the edge of the cupcake liner.
12.  Bake for 20 minutes (until light and springy to the touch, and when a cake tester comes out clean).
13.  Leave to cool completely before frosting/decorating.

For the buttercream frosting, with enough to pipe at least 16-24 depending on the type of piping (and the rest will always keep a little while in the fridge if there are leftovers... just another excuse to bake more cupcakes!!)

Ingredients:

18oz icing sugar
12oz unsalted butter
1 tsp lemon extract
2 tbsp whole milk

Method:

1.  Beat sugar with the mixer until it is a little soft.
2.  Add icing sugar, extract and milk.
3.  Beat together until combined, soft and creamy.
4.  Pipe with a tip of your choice and decorate as desired!
 
Enjoy baking these delicious Earl Grey Tea cupcakes ♥
 
Let me know if you have any questions about the recipe :)

Sunday, 6 October 2013

A Taste of Britain: Cherry Bakewells for a British Bride-to-Be ♥

What a fun day!  I had the pleasure of being invited to a friend's bridal shower out in Hamilton today - somewhere I had never been although I have lived in Toronto for over 4 years now!  So off I went on a little mini adventure of my own, taking the bus and the train (with some quality book reading time to myself!!) and getting to spend the day with an old friend from England who also now lives in Canada - yey!

I'm super excited that I will get to share in their wedding day in November, and was so happy to be able to join her today at her English tea party themed shower!  What great friends she has :)  Everything was decorated with red, white and blue, with streamers, bunting and Union Jack patterned plates her sister even shipped from England for the party!  There were afternoon tea style sandwiches, scones and teacup cupcakes as well as lots of amazing tea cups and saucers for the tea of course.  Everything was delicious - I'm stuffed!!

For the party I asked if I could take something along, perhaps something English inspired.  And they said yes!  Yey!  An excuse to bake wahoo :-D


I knew the perfect item for the day - something I had baked just once before and included on my blog when I first started to write up posts before I made the blog live, and to be honest...it's a terrible post with terrible photos... so here goes take 2!  Hope you don't mind the repeat - but honestly, check it out and make the comparison - I hope you think this one is better hehe!

This Cherry Bakewell traybake definitely was the front runner while thinking about the best thing to bake.  I knew my friend had mentioned Bakewell Tarts whilst once talking about English treats we miss!  And I thought a traybake style would be a good one to cook, and then slice up each to eat in little pieces for party food.  I also love how these little squares look, the pure white icing flooded over the top, and then of course a cherry on top - literally!!

I got some really nice feedback from everyone - it was great to hear that they all liked the cakes - especially as they were something they hadn't tried before :)  I know I also got a big thumbs up from Jonathan too - he got a few of the extras before I left for the shower ~ Breakfast Bakewells!!  ... But it was nice to get the positive comments too from not my biased husband!!!

So, if you're also unfamiliar with Cherry Bakewells here's the breakdown of what makes it SO SUPER delicious!

First off, the bottom layer is a deliciously unhealthy sweet shortcrust pastry.  The original recipe stated to use the ready-made ready-to-roll kind... However not only is this sweet shortcrust not really available like that anywhere I have seen in Toronto, but also, where's the fun in that?!  I rarely get the chance to do much pastry cooking so it's fine by me to have the opportunity to do this.  But if you're in a country - like England where you can buy this ready-made pastry easily, it certainly would cut the cooking time down.

So bottom layer pastry, with a juicy layer of strawberry jam on top.  Next up is the almond spongey cake - a frangipane topped with a thick layer of icing, and sprinkled with toasted flaked almonds and of course, that cherry on top!

So it's a little of a Bakewell Tart (pastry, jam and frangipane topped with sliced almonds) and a little more of a Cherry Bakewell (my favourite is the Mr. Kipling brand!) which are baked in small tart shells and topped with the thick icing layer and a cherry on top.  These are some we ate recently brought back from my July trip to England :)

Mix those two delicious treats together and bake in a traybake and you have this Cherry Bakewell traybake that makes for a perfect sweet addition to any English tea party!

Recipe time!  I'll include the recipe for the pastry too if you want to try this out as well, let me know if you have any questions about any part of it :)  Would be happy to spread the cherry bakewell love ♥

For the pastry... This made 565g of pastry dough which covered the traybake pan (33x23cm) and had some left over.

Ingredients:

300g plain flour
150g unsalted butter, chilled and chopped.
90g caster sugar (for the first time I actually tried using the Lantic dissolving sugar as I often cannot find caster sugar here... it worked!  I'll use it again for sure)
1 egg yolk
1.5 tablespoon chilled water

Method:

1.  Combine flour, butter and sugar in a bowl (or food processor) and rub between fingertips until the mixture resembles fine breadcrumbs.  I use my fingertips for the majority of this process, until the butter is soft and combined with the flour in the breadcrumbs, but then also use the pastry cutter just to make sure no lumps are left!


2.  Add the yolk and chilled water and combine until the dough just comes together.

3.  Turn the pastry onto a lightly floured surface and knead until smooth.  Shape into a disc and wrap in cling film and refrigerate for 30 minutes.

So 30 minutes to kill?!... Nope!  Time to get to work on the cake part of the traybake....(and also to kindly ask your VERY KIND husband to run to the shop to get some seedless strawberry jam, because the one in your fridge you thought was correct ACTUALLY was raspberry ... booo!!)

For the frangipane:

Ingredients:

500g sweet shortcrust pastry
6 tbsp strawberry jam (I chose seedless as a personal preference for a smoother taste!)
200g unsalted butter
200g granulated sugar (I didn't want to risk the dissolving extra fine sugar here for this but if you have the real deal caster sugar go with that!)
4 eggs
100g ground almonds
100g self-raising flour
1 tsp pure almond extract
300g icing sugar (powdered sugar)
3 tbsp water
24 glacé cherries
25g toasted flaked almonds (2 minutes carefully watched in the toaster oven did it for me)

Method:

1.  Preheat the oven to 200°C/390°F.
2.  On a lightly floured surface, roll out the pastry to fit the base of the traybake pan.  (Mine is a Wilton 33 x 23cm)


3.  Spread the jam over the pastry base.


4.  Place the butter and caster sugar in a large bowl and beat in mixer (or with a hand whisk) until smooth and creamy.


5.  Beat in the eggs one at a time, adding 1 tbsp ground almonds after each addition.

6.  Add the flour, remaining ground almonds and almond extract and stir well.


7.  Spoon the mixture over the jam, spreading to make an even layer.


8.  Bake for 35 - 40 minutes until well risen, firm and golden.  Remove from the oven and leave to cool in the tin.


At this point, once the cake was cooled, I actually very carefully (and maybe too riskily) turned out the cake/pastry onto a chopping board as I didn't really want to be slicing the cake in the non-stick pan.  If you're not as weird about that as I am do just leave it in there and pour the icing over and cut into it no problem!

9.  When the cake is cooled make a start on the icing.  Sieve the icing sugar into a large mixing bowl and add 3 tbsp water to make a fairly thick icing.


10.  Spoon the icing on top, spreading evenly.


11.  Decorate with glacĂ© cherries and flaked almonds and leave to set.


12.  Cut the tart into squares or rectangles, serve and enjoy :)

Like seriously enjoy... the crunchy flaky bite through the pastry, the juicy fruity jam layer and the spongey almond flavour with the added sweetness on top.  I'm about to enjoy one of the extras right now actually... YUM!


Happy Bakewell-ing!  
And HUGE congratulations to the bride-to-be ♥ 
I'm a big fan of British girl marrying Canadian boy and can't wait to share your special day :)