Monday 28 April 2014

Sewing into Spring ~ Pocket Sneaker Chicks

Spring is here!!  ... And so is what seems like ALL the craziness happening at once.  Busy busy busy busy busy!  But I'm sure I want to still write a post per week, but forgive me - I didn't actually make these this week - but actually a few weeks ago for Easter.  BUT I didn't post them for Easter, so here they are!  Spring chicks :-)
 
 
Some of you reading might have seen what surprise they were used for over Easter, but well - it's not Easter anymore so I'll leave them as just my Spring Chicks!
 
 
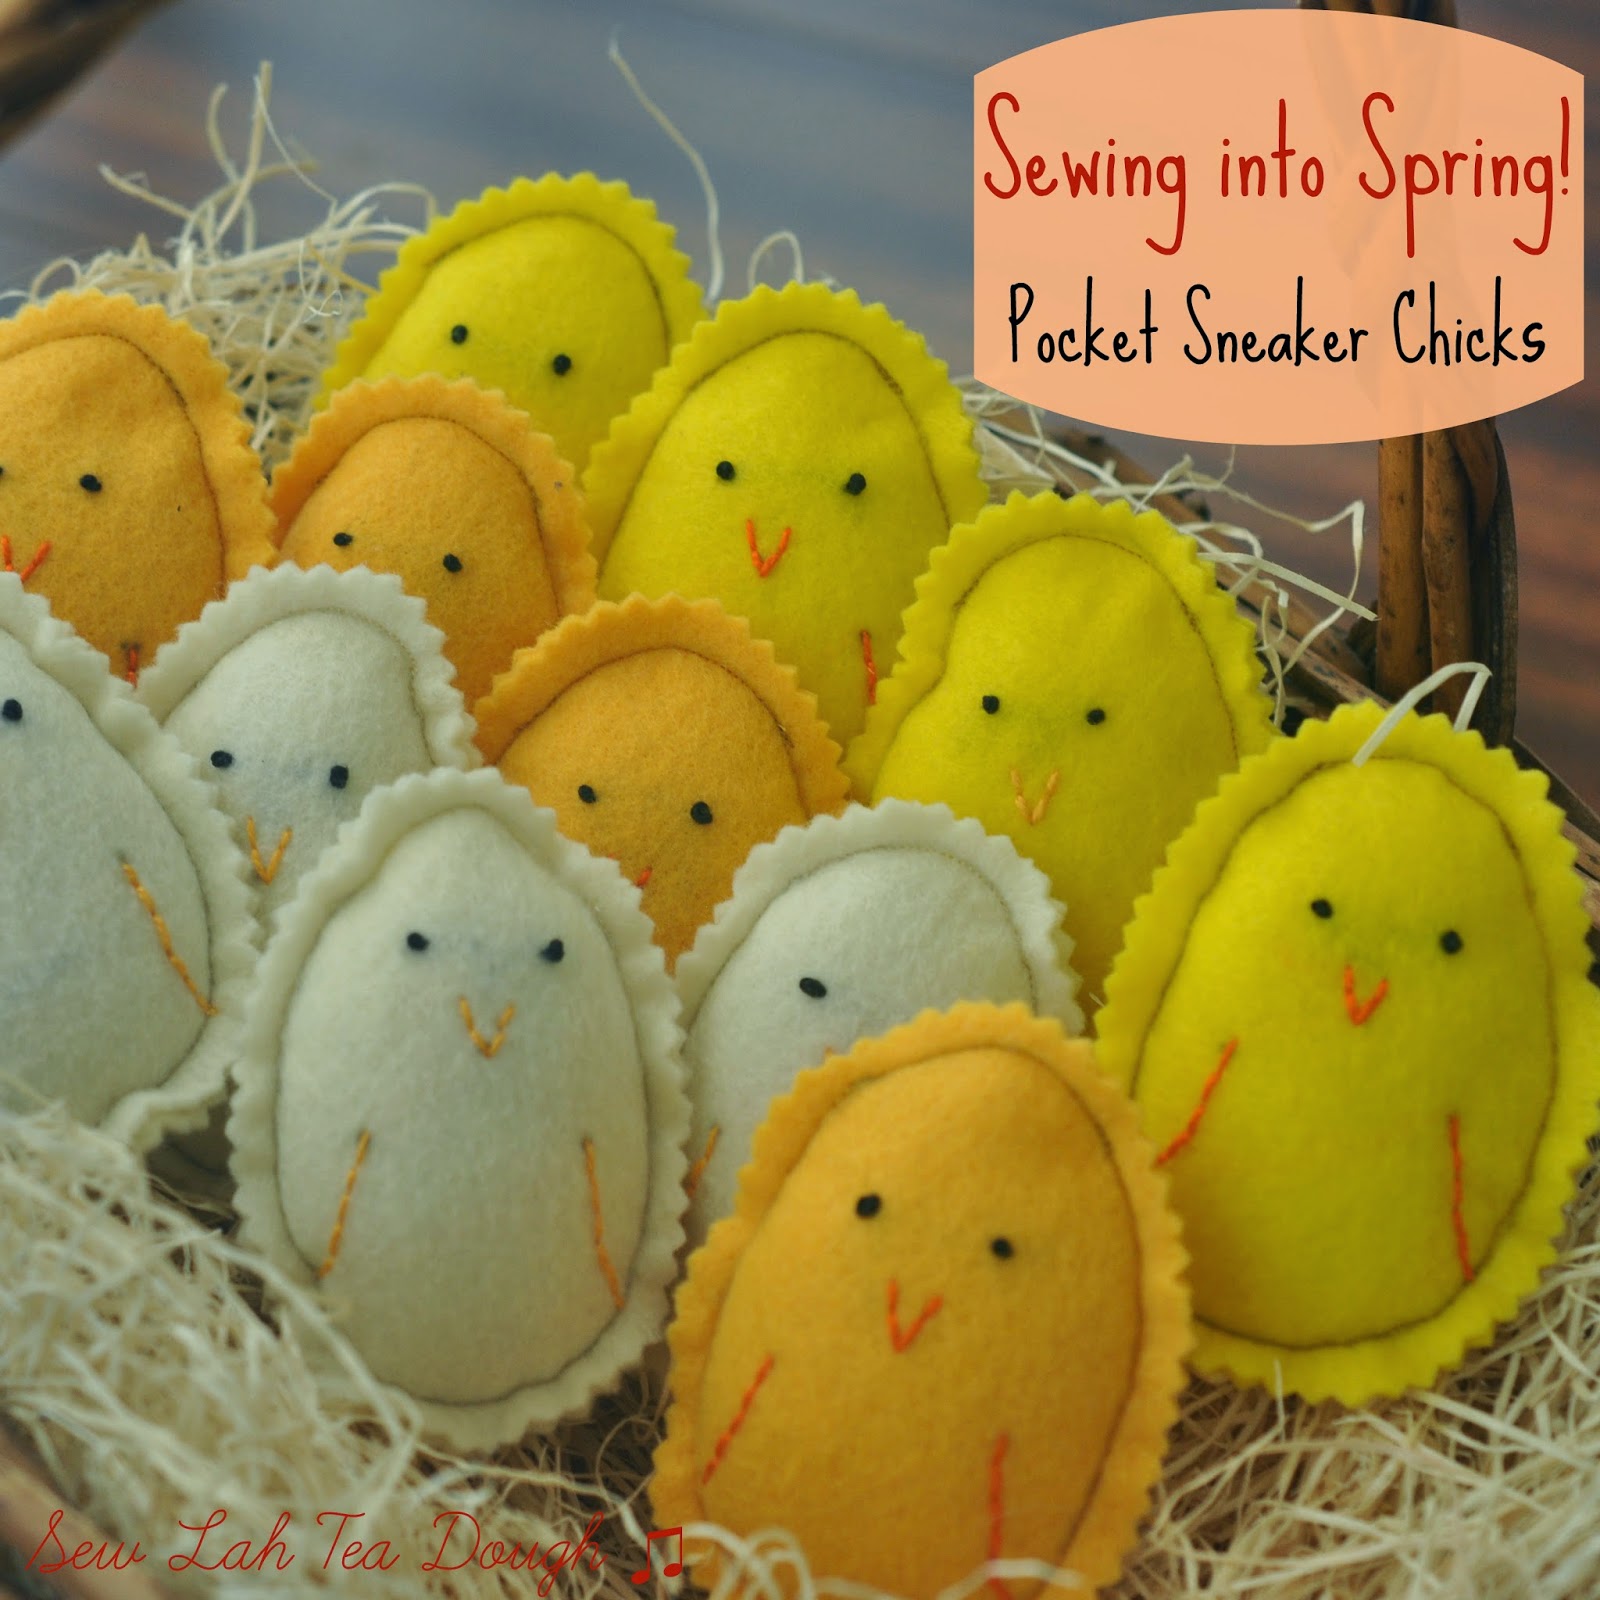
I'm totally in love with the newest in my pocket sneaker series - these little chicks, and whilst they weren't used as my hearts and lucky charm pocket sneakers were for my husband - they were hand delivered at Easter and were very similar in the way I made them, and in their size, so I think I can go with the same pocket sneaker series!


Even making these on a time crunch I actually remembered to take a few photos as I went along so I can share with you how I made them!  They were nice and easy, and if you don't have a machine could be all hand sewn, although the machine did speed things up - and I like that.


When shopping for the felt I would use in this project I couldn't decide which yellow/orange/other chick colour would look best once they were all made... so ... well ... I got a variety and made them all!  In the end my particular favourite was the cream coloured chick, but after making them all and distributing them to family we shared the colours, and I think I liked them all, and especially liked that there were different colours to choose for different people so I'm glad I couldn't decide in Michael's that day!
 
 
Using a picmonkey egg I had seen on my travels through creating cover photos for my blog, I made the image in various sizes and printed it from a word document.  I had an idea of what size I wanted to make the chicks, but did trial and error on the actual egg size I printed to find the perfect one.  Oh yes, and I chose an egg shape for a chick?!  Coincidence it was all Easter themed but in my head the perfect "cute" chick shape would be an egg!


I cut out the egg in the size of my choice, and then backed it onto some sturdier card so I would be able to keep the template and use it again.

 
This little egg ready and waiting to be cut out to be the start of the chick making adventure!
 
 
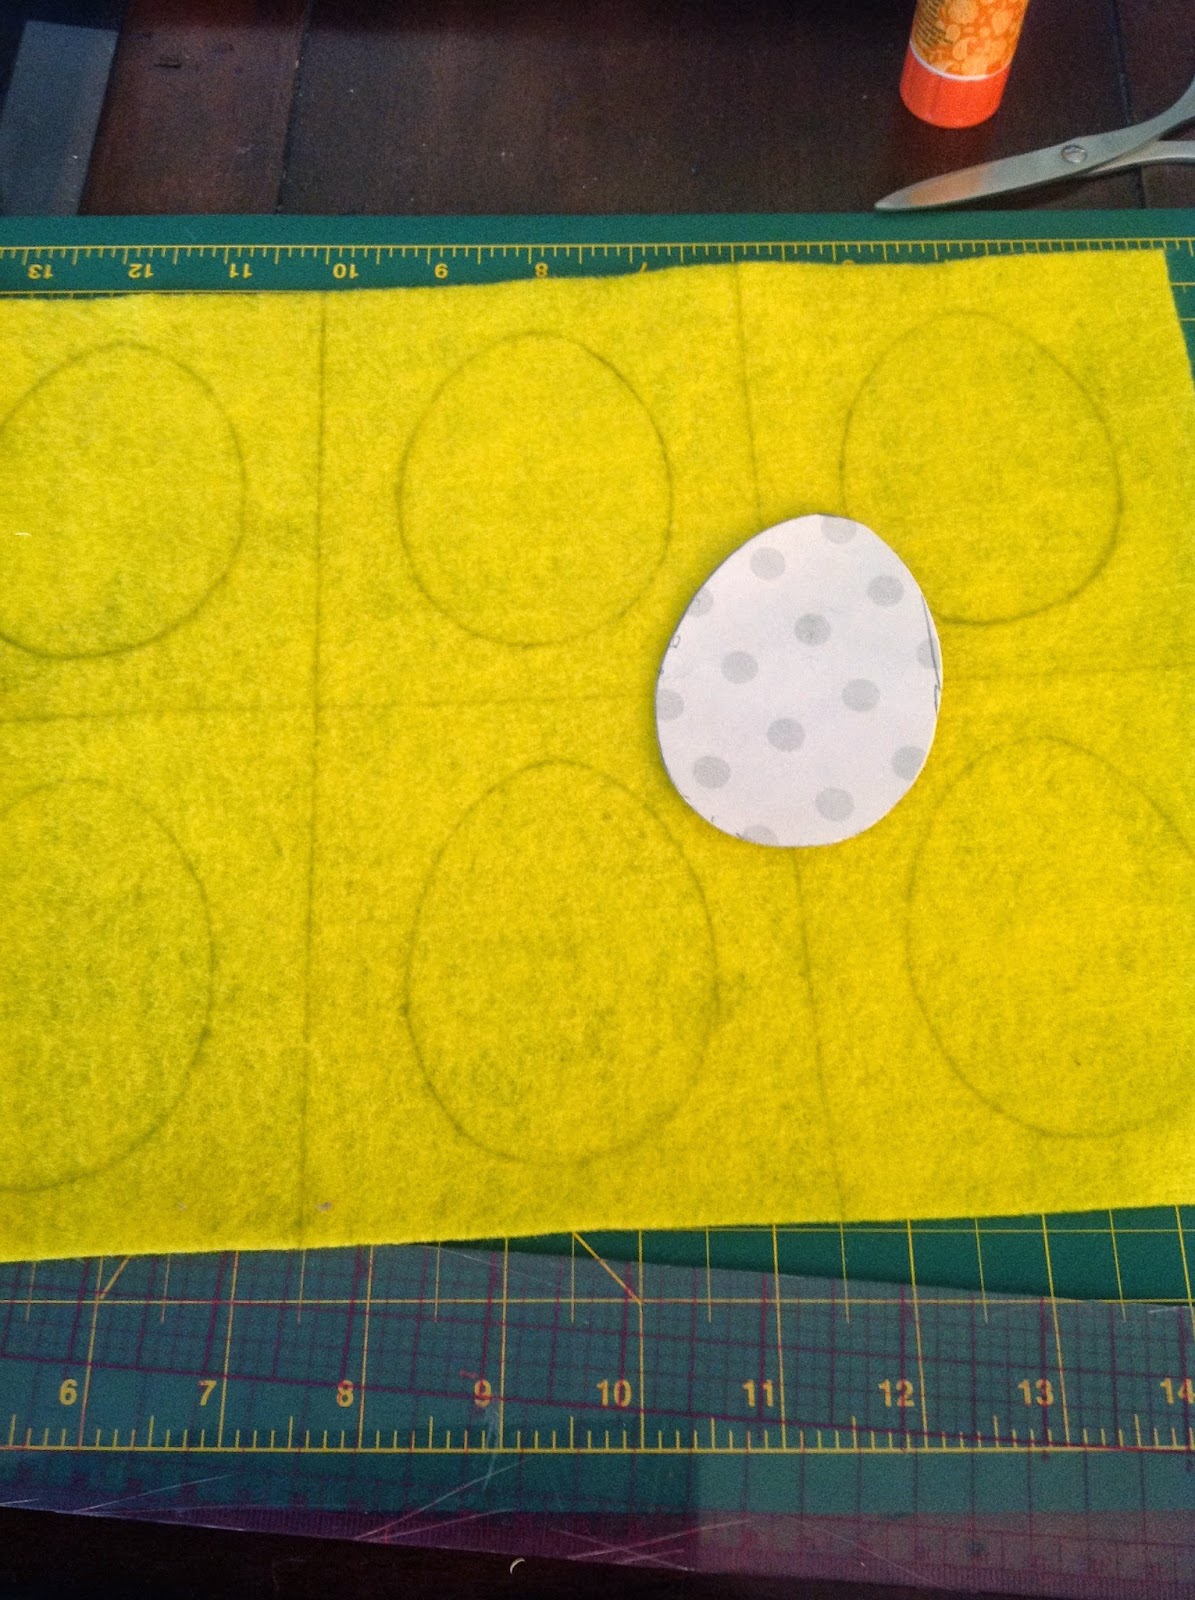
I divided the felt sheet into 6 first of all and then traced the outline of the egg shape into each box.  Error here on my part was using a regular pencil and not a better pencil/pen that would fade away, but luckily most of my stitches covered the pencil markings in the end.
 
I then cut out each square of felt (but not the egg shape - this would be my sewing guide later on) in each of the three chick colours, eventually having 12 squares for each colour, 36 in total... which would make 18 chicks as each chick needed a front and back.
 
Whilst our youth group played a soccer tournament all day, I entertained myself by sewing the details on each front piece of the chick!
 
 
I'm most pleased with my chick eyes!! I advanced from my usual back stitching and actually tried a real embroidery knot!  Admittedly some eyes were bigger than others, but by the end of 18 chicks the eyes were nice and small, and tight - just what I wanted! 
 
I used a black embroidery thread for all of the eyes, and either a bright orange or pale orange for the beak and wing details, whichever matched the felt colour best.


Back home with all of the embroidery done it was time to stuff them and sew!  I pinned the fronts to the backs to secure each part together and then with the machine went around most of the egg shape with a coordinating thread (NOT the red that is in the picture for some reason... perhaps that was what was on the machine before I started with the yellows!). 


Leaving a small centimetre gap somewhere along the egg shape would allow me to pause on the sewing, and stuff the chicks before going back to the machine and finishing it off. 

The stuffing part is my favourite element of the 'pocket sneakers' I've made over the past year or so.  Giving them a chubby look and a soft padded feel, it was just what I envisioned for these little chicks.

 
So with all 18 chicks sewn around the edge of the egg shape, I cut out around the edge of the egg shape with pinking shears to give the pocket sneaker look of the jagged edge that I wanted!

 
And voila - here they all are, my little chicks in a basket!  I love how they turned out, and was a little sad to be giving these cute little guys away - although all for a good reason!  ... And I did get to keep a few for next Easter - I'll use them as decorations somewhere.
 
 
The chicks are super cute, and if you're happy doing some sewing are nice and easy to make!  If you try them out, do send me a picture :-)


Monday 21 April 2014

Easter Bunny Lemon Cake ✿

 
Happy Easter long weekend everybody! 
I hope you all had a wonderful time celebrating with family and friends :-)
 
We had a great time at my in-laws with 19 of us celebrating together, enjoying a delicious dinner, WAY too much food and lots of dessert.
 
I made a cake to share on the dessert table, and with Spring in the air I chose a lemon cake, with raspberry jam and lemon buttercream filling and decoration.  I had a plan for the decorations in mind after I picked up a new cookie cutter that came with a flower shaped cutter for the tail!!  Actually we were shopping and my husband actually thought it would be a great addition to my already overflowing cookie cutter collection, so now he can't complain I have too many :-P


I chose to add some sugar sprinkles to the fondant rabbit cut outs to give it a different texture so it would stand out from the bunny shape itself.  I made the fondant rabbits the day before baking day so that they would dry out a little to make it harder and able to stand up against the cake, and not let the buttercream add moisture and go soft and floppy.  I didn't want these Easter bunnies to be floppy bunnies around the cake!!


So that was my first vision... I knew I wanted the Easter bunnies to stand facing in around the cake, but what to go on the top?  And what colour should the buttercream be?!
 
Initially I thought I would go with a bright colour for Spring, and perhaps add some coloured mini eggs over the top... but well, on making the buttercream, I went with a little blue, but didn't like it... and then thought, maybe some red added would make a good purple.
 
And after realising that this wasn't the original plan and that I was okay with that, I actually really liked the muted purple contrasting with the white fondant rabbits.  So I thought I would add some more white to the cake and cut out some mini flowers for the top! 
 
 
And that's everything you can see on the outside...Now for the actual cake part!  The recipe I used for the Easter cake is the same recipe my Mum used for one layer of our wedding cake nearly 3 years ago, yey! ♥  I then just made a basic lemon buttercream to fill the middle and frost the outside of the cake.  Keep reading for the recipe! 


Ingredients:

14oz unsalted butter
15 3/4oz sugar
14oz self-raising flour
14oz eggs (one egg can be between 1-2oz) so I ended up using 8 large eggs for this recipe
3 1/2 tbsp milk
Zest of 2 lemons

For the syrup:
2 tbsp sugar
2 tbsp. hot water
2 tbsp. fresh lemon juice

 
Method:
 
1.  Pre-heat oven to 180°C/ 355°F and grease and line two 9" sandwich tins.
2.  Place all sponge cake ingredients in a mixing bowl.  Mix on a slow speed until there are no lumps of fat.  Scrape down at all stages.
3.  Mix on a medium speed for 2 minutes and then full speed for a further 1 minute.
4.  Spoon the mixture into the line cake tins.
5.  Bake until cooked - 35 - 45 minutes - until the top is golden brown, and a cake tester comes out clean.
6.  Leave to cool on a cooling rack.  Once the cake is taken out of the tin brush the surfaces with lemon stock syrup.
 
*** Make the syrup while the cake is in the oven ***
 
1.  Dissolve the caster sugar in hot water
2.  Then add the fresh lemon juice
3.  Mix together and spread generously over the cake with a pastry brush and let it soak in.
 
 
For the buttercream - beat together 16oz unsalted butter with 24oz icing sugar.  Add 1 1/2 tbsp lemon juice and 1 1/2 tbsp milk and mix until combined.  Add food colouring as desired. 
 
This made enough buttercream to fill the middle of the cake, to frost the outside, and with enough leftover that it wasn't tight to be able to cover the cake comfortably.  Phew!
 
 
Have a great long weekend day today if you didn't have to go back to work/school!  Thanks for reading :-)

Saturday 12 April 2014

Loaf Cake Part 2 ~ Cherry Bakewell Loaf

So here it is... Part 2!
 
 
Today I am sharing with you the second fro my two-part loaf cake blog posts from the two loaf cakes I made for my choir's silent auction at the end of March.  I have had SUCH a hard time deciding which my favourite of the two are.  I mean, the lemon loaf that I wrote up last week is LEMON...  My absolute favourite!  But this Cherry Bakewell inspired almond loaf cake is way up there on my favourites list as well.  Hmm...
 
 
Well, I guess the lucky thing is I have this blog, and I usually post once per week, and seeing as it has been a crazy busy week at work, at home, at everywhere that it is actually nice to be able to finish up this short 2-part loaf cake series and I am able to share both with you all... maybe you can help me decide which you think the best one is!!  Keep reading for today's post, but click here to see last week's lemon loaf :-)
 
 
In addition to the lemon cake, I also wanted to make a loaf cake that was just a little bit different.  I toyed with the idea of a golden syrup cake, and then that inspired me to go with something British... but a little different.  The idea that sprung to mind then was one of my favourites, a Cherry Bakewell.  I mean you have seen me make these a good few times before, in traybake form.  But this time I switched it up a bit and went with an almond loaf cake, with the same white icing, cherry and sliced almond topping to decorate.  Without the shortcrust pastry you would find in the cherry bakewell tart or the jam layer between, it is a simple take on the classic English treat - in loaf form!  Nice and easy to make, with a delicious looking thick white icing spread on top with, quite literally a cherry (or a few!) on top!!
 
This recipe will make a standard loaf pan full, as well as 4 cupcakes.  I made extra cupcakes as I was giving the loaf acke away and wanted to be able to try it myself, and actually ended up doing some Easter decorating and created my Eggs in a Nest Cupcakes :-)  Check them out here!
 
So here goes...
 
Ingredients:
 
9oz unsalted butter, softened
9oz sugar
9oz self raising flour ~ minus 4 1/2 tbsp ~ you will replace this with the ground almonds
4 eggs
4 1/2 tbsp ground almonds
2 1/4 tsp almond extract
Method:
 
1.  Pre-heat your oven to 375°F and grease and line your loaf pan, and cupcake liners 
 
2.  Cream together the butter and sugar until light and fluffy.
3.  Add the eggs, one at a time - beating well between each addition.
4.  Add the almond extract and mix well.
5.  Sift in the flour and ground almonds and mix until combined.
6.  Pour most of the batter into the loaf pan, and then just a small amount (filling just to half-way) in each cupcake case.
7.  Bake the cupcakes for 15-20 minutes, but the loaf cake for 35-45 minutes, until browned on top, and cooked through ~ you can test with a cake tester/ potato skewer.
8.  Leave to cool and then you can decorate!
 
 For the "icing on top"... I use powdered icing sugar, poured into a cup and then just a few drops of water as I didn't want it to be too runny.  I love the idea of a thick spread of the icing, and thing this is a pretty crucial part to the classic cherry bakewells, a crucial part I wanted to keep!  So keep it thick and spread it on generously! 


For added decoration and staying true to bakewell tarts, and cherry bakewells I added sliced almonds (toasted in the oven for just a couple of minutes to brown them slightly) and added them while they were still not completely cooled as this way they would set into the icing...


And then the cherries!  What would a cherry bakewell be without cherries!?  I lined them down the centre so that every slice, you would get a cherry!  ... Or maybe two if you cut yourself a BIG piece :-D


Funnily enough, it was my husband's Aunt who placed the winning bid on this silent auction loaf cake... and she told me the next morning that after the concert she was already digging into the cake on the way home!  She did share it for breakfast the next morning as well! 

 
SO many of Jonathan's family are almond fans, so I'm sure this cake will be making an appearance again!
 
 
Which would you have picked?  My lemon loaf from last week, or the almond cake this week?!  It is so hard to pick my favourite!

Saturday 5 April 2014

Loaf Cake Part 1 ~ Lemon Loaf

So as promised last week, today I will be sharing more details on the loaf cakes I made for my choir's Silent Auction.  For the occasion, I made 2 loaf cakes to donate and try and raise funds, and that they did - they both sold - yey!

 
Last week I shared my Eggs in a Nest Cupcakes which I made from the extra half batch of each loaf batter that I made for the choir so that of course I was able to taste the cake, and also have my own few extras to eat ... and to share I guess too!  I also wanted to use new cupcake cases I had been given, and of course jump on the April/Easter boat and get excited for Spring!!  Check them out here :-)


So this week I'll start of the Loaf Cake 2-part series with a Lemon Loaf, adapted from a recipe given to me by my university housemate of 4 year's Mum... I loved it when she would come back from a visit home and would bring her Mum's "Luscious Lemon Loaf", so much so I even got a special recipe notecard from her and have made it many many many times since.

But then the worst happened.  Saturday morning I went to get the notecard and it was GONE.  Not where I left it, or where it should have been so I had to improvise a little... Now don't worry, my amazing best housemate has already re-sent me the recipe so I will never be without again but on the day, there was no time to spare, I had to do lots of baking and sewing too all before our choir concert.

 
So here's a few pictures and the recipe (not the original "Luscious Lemon Loaf" but my own adaptation from last weekend!)...


I made a loaf cake and also 4 cupcakes from this recipe, but if you are just looking to make a loaf then just do 3/4 of the recipe instead.  But really, who could say no to a little taste-test!? ... Especially if you're giving the loaf away or sharing with family/friends!

Ingredients:

9oz margarine
9oz sugar
3 tbsp milk
9oz self-raising flour
3 eggs
Zest of 1 lemon

and for the glaze:
6 rounded tablespoons icing sugar
Juice of 1 lemon

Method:

1.  Preheat the oven to 350°F and grease and line a loaf tin, and prepare 4 cupcake cases. 
2.  Beat together the margarine and sugar.
3.  Add the milk and mix together.
4.  Sift flour and mix until combined.
5.  Add eggs and beat after each addition.
5.  Add lemon zest and mix together one last time!
6.  Fill the prepared loaf tin, and use the remaining batter for a few bonus cupcakes.
7.  Bake the cupcake for 15-20 minutes (until golden brown and a cake tester comes out clean) and bake the loaf cake for 40-50 minutes.

While the cake is baking, make the glaze so it can be spread over the warm cake as soon as it comes out of the oven...

8.  Mix together the icing sugar and lemon juice.
9.  When the cake is baked and out of the oven.  Leave in the tin to cool and immediately spread the glaze over the cake until it soaks in.

... And the final step is to just ENJOY!  This is lemon at it's best!  Lemon glaze on a lemon cake, in my eyes there is nothing better!

I packaged the loaves up in brown parchment paper, and tied up with string... ♫ These are a few of my favourite things ♫ ... of course!

 
And a little tag to go along with the silent auction bidding sheet... I wanted to make sure whoever won the cake knew what it was!
 
 
So there were indeed two loaf cakes I promised... today you'll have read about the Lemon Loaf Cake, and check back next weekend to hear how I turned a British favourite of mine ~ the Cherry Bakewell and turned it into a loaf cake :-)  Scroll down to the bottom of the page and fill out your email to always be the first to read a post and never miss a recipe!


This time last year I asked 'Spring are you Here'?!  Little did I know this past Winter would be even longer... even colder... even snowier than 2013!  So really, the same question still lies although I think, think Spring may have actually arrived now!
 
 
To get in the mood check out last year's Spring Cake