Monday 24 February 2014

Worksheet Game for St. Patrick's Day!

Alright... Well there has been a whole lot of baking going on so far this year and not much else!  My sewing machine hasn't made an appearance (although I'm definitely going to rectify that in the next couple of weeks) and there hasn't even been much crafting, beyond a few handmade cards and a small Valentine project for Jonathan... So today, you will NOT be reading about cake!  (Sorry if that's your favourite part), but it's time for something a little different. 
 
This weekend I came up a new worksheet that I'll be using for my piano students during March in celebration of St. Patrick's Day. 
 
 
While I was making it, and thinking of how it would work during my piano lessons, I thought it would be great to keep it general - then anybody can use it!
 
Using PicMonkey for the first time in creating the full worksheet (and then using the image in word, before saving as a PDF!) I used lots of shamrock shapes, with a starting point and 10 small shamrocks before reaching the 'You Win' pot of gold at the end of the line of shamrocks.
 
 
My plan for that pot of gold is to have a chocolate coin to aim for! 

Keeping it simple and generic I just stated that you should 'Follow instructions and move along the shamrocks to make it to your pot of gold at the end of the game'... 
 
Whether instructions are being given by a piano teacher like me, another teacher or parent this worksheet game can be adapted to anything.
 
The PDF is on Google Drive, and anybody with THIS LINK can download and print it as you like (just print on 'Actual Size').  Click here to see it.  If you're looking for a lower colour option, then perhaps printing in 'draft' will save your printing costs :)
 
Like I say, the instructions my piano students will be following are musical ones - I have a few students taking RCM piano exams in April so lots of the instructions will be based on scales, chords, ear testing and sight reading etc in preparation for the technical side of their exam. 
 
For my beginning piano students we'll do some fun challenges - playing high/low.. performing a piece loudly or softly, playing their pentascales... And some other fun ways of playing.
 
In addition to the worksheet, I also created a List of Instructions to print and go along with the worksheet.  You can download this one here - just click THIS link!
 
 
With there being 10 small shamrocks, and then one final step to finally reach the pot of gold finish point I put a Bonus to Finish instruction as well, this might be something fun, or something my student has trouble with - or maybe the point where the student can play their favourite exam piece, or play their Irish piece of music we'll be learning in March ♫
 
I'm sure you'll be able to think of LOTS of ways to use this in your lives - whether as parents or as education providers, but here are a few idea I had so far...
 
Perhaps your child has a spelling test coming up... Can they spell 10 + bonus words correctly in studying for their test!?
 
Or are there some chores your little one needs some motivation with... Maybe there will be a bonus $1 gold coin waiting for them at the end of the list of Shamrock Chores?!
 
Have some fun with homework or learning... Follow instructions to gain a 'gold coin' or other reward that fits with your current reward system!
 
Any other ideas you come up with I'd love to know!!  Just leave me a comment telling me how you enjoyed playing this Shamrock game :-)
 
I'll post some more pictures of the game in use during my piano lessons as we get further into March and play on St. Patrick's Day ♧


Sunday 16 February 2014

DIY Heart Doughnuts ♥

 
... or should that be Donuts?!  That's probably what lots of you all reading this thought!  It is the 5th year I have been living in Canada, but there are some things I haven't changed in my spelling, or how I say things.  So my apologies to you if you were expecting donuts!  But please believe me, doughnuts and donuts ARE the same great tasting treats we all love!
 
I hope you all had a LOVEly Valentine's Day celebrating ♥ My husband treated me to a delicious dinner he cooked all afternoon ... an incredible lamb roast (my favourite), with mushroom risotto (my favourite favourite!) and then I did dessert... And well, I think you already know what it is!
 
Last year he also did dessert and thought it would be fun to make our own truffles!  Check out last year's Valentine's post to see more on that... He prepared the chocolate truffle, but we scooped and chose the toppings to roll them in - they were so delicious!
 
So this year, I wanted something we both liked, but that also would be fun to do together after dinner... Cue the DIY doughnuts!  During the day I did the prep work for them.  Making the dough, letting it rise, cutting it out into the heart shapes and then letting it rise once again before baking them.
 
That's right - BAKED doughnuts!   SO healthy right?!  I think in comparison to fried yes... still they're doughnuts but whatever - it was Valentine's Day!  Still, they were pretty good!!
 
I'll start with the recipe and pictures... but keep reading to see the fun part of decorating them which is the bit we did together! 
 
I originally found the recipe here on Spark People Recipes, and although I halved the recipe (which made plenty for the 2 of us!) there are a couple of things I would change next time I make the recipe which I will mention here just in case you want to try it too.
 
Ingredients (to make 12-16 heart doughnuts, depending on the size you make!)
 
2 - 2.5 cups all purpose flour
1 tablespoon yeast
1/2 cup milk (we drink 1% so that's what went into these!)
3 tablespoons unsalted butter
1/8 cup granulated sugar
1/2 teaspoon salt
1 egg
 
Method
 
1.  Mix 1 cup of flour with the yeast.
 
 
2.  Heat the milk, butter and sugar until it reaches 140°F (I found this to be when the milk was simmering but not boiling yet).


3.  Add the milk mixture to the flour, along with the eggs, and mix until smooth.  (Here's where I would change something next time... I wasn't convinced that all of my yeast was completely dissolved in the milk.  I might do that separately from the flour next time and then add it afterwards).

 
4.  Add more flour, a little at a time until the dough is smooth.
 
 
5.  Cover and let the dough rise in a warm, draft-free area for 1 hour, until it doubles in size.  

 
6.  Split the dough in half and roll each half into a rectangle.  Using a heart shaped cookie cutter (or 2 as I did for different sizes!) cut out hearts from each half.  Use as much of the dough as possible!


7.  Grease two baking sheets and place the hearts on them.  Let them rise for another 30 minutes and preheat your oven to 375°F. 


8.  Bake the doughnuts for 12-15 minutes, until golden brown.


... Now for the fun DIY part of the evening.  Decorating the doughnuts (once they were cool!) :)
 
We each had 4 of the best looking ones as our "real" doughnuts to decorate.  But we also had a few small ones each (which I think didn't hold their heart shape as well) and a couple of extra large sized that well, just didn't look as pretty as these!
 
 
Dinner cleaned up and our decorating workstation ready!!  For most of the doughnuts I made a little water icing - powdered sugar and a little water stirred up and ready to use!


This is one of my favourites that Jonathan made!  Icing on top with cookies and cream crumble all over the top.  I can totally see this one at Tim Horton's!!


Here are my four you've already seen up at the top...
 
 
Icing and chocolate sprinkles...


White icing and edible pearls for the classy look...

 
The colourful fun guy dipped in sprinkles!


And the pink writing icing stripes on this one... I wouldn't usually choose pink, but well it was Valentine's Day after all ♥


These are Jonathan's featured four!  He has the cookies and cream... a good old fashioned plain doughnut dipped in sugar... the bottom left one might look the same as this but actually it's filled with Strawberry Rhubarb JAM!!  (His favourite!)... and then the final one is a glazed doughnut!


The original recipe said if we shook the hot doughnuts in sugar it would stick... Hmm well we tried this and it didn't work for us!  So we melted some butter and lightly greased them up before dipping them in sugar.  This did stick so it worked for us :)

 
Anddd, with icing and creativity still leftover we also decorated some of the small hearts as well!  

 
We were pretty impressed with the taste of the baked doughnuts and it was a lot of fun to create and decorate these together as part of our Valentine's Day dinner ♥
 
Have a great week & thanks for reading!!
 
*** My blog is 1 year old ***
 
Look back at what I wrote 1 year ago today!


Sunday 9 February 2014

My husband's favourite time of year!

It's not often my husband will, not only wake up before me, but also get up and make coffee before I have even begun to think about getting up... But, Thursday morning - the day before the 2014 Winter Olympics officially starts he was out on the couch, watching TV first thing in the morning.  Not many things get him up and awake... but the Olympics is definitely one of them!! ... And I got my breakfast out of it too, so can't really complain!

Not only is it the start of the Olympics this week, but last Monday it was my amazing husband's birthday!  We kind of celebrated all weekend, with a snowy day out on the Saturday, a family day on Sunday - with the Superbowl of course, and then birthday breakfast, presents (a bit of work/school) and then a delicious dinner out together on Monday night!

So, with both of these exciting events happening for Jonathan all in one week, there was only one way to go with his birthday cake this year...

 
... His very own Winter Olympic cake, in two tiers, with two flavours I just knew he would love.
 
For the bottom flavour, I used my go-to Red Velvet Cake recipe from Joy of Baking.  Since the first time I tried this recipe, it has never failed me and I LOVE the taste of the cake so why change?!  Find the recipe here
 
 
2 9" sandwich pans filled and baked... Next up was the buttercream!  This is the thing I do differently to the original recipe, filling the cake with buttercream (with a hint of vanilla), instead of cream cheese icing.


For the top tier, I was undecided whether to do a vanilla cake, or something a bit different.  The 'something different' was the winner!  I went with an almond cake, filled with plain buttercream.  Jonathan LOVES almond flavour, and most of his family do too, so I'm glad I went with this one, as it was a hit!  I'll definitely be using this one again for something or somebody else!  I'll add the recipe for this at the bottom of the post.

So with a 9 inch red velvet cake... a 6 inch almond cake all ready, just sitting out cooling - it was time to get icing!

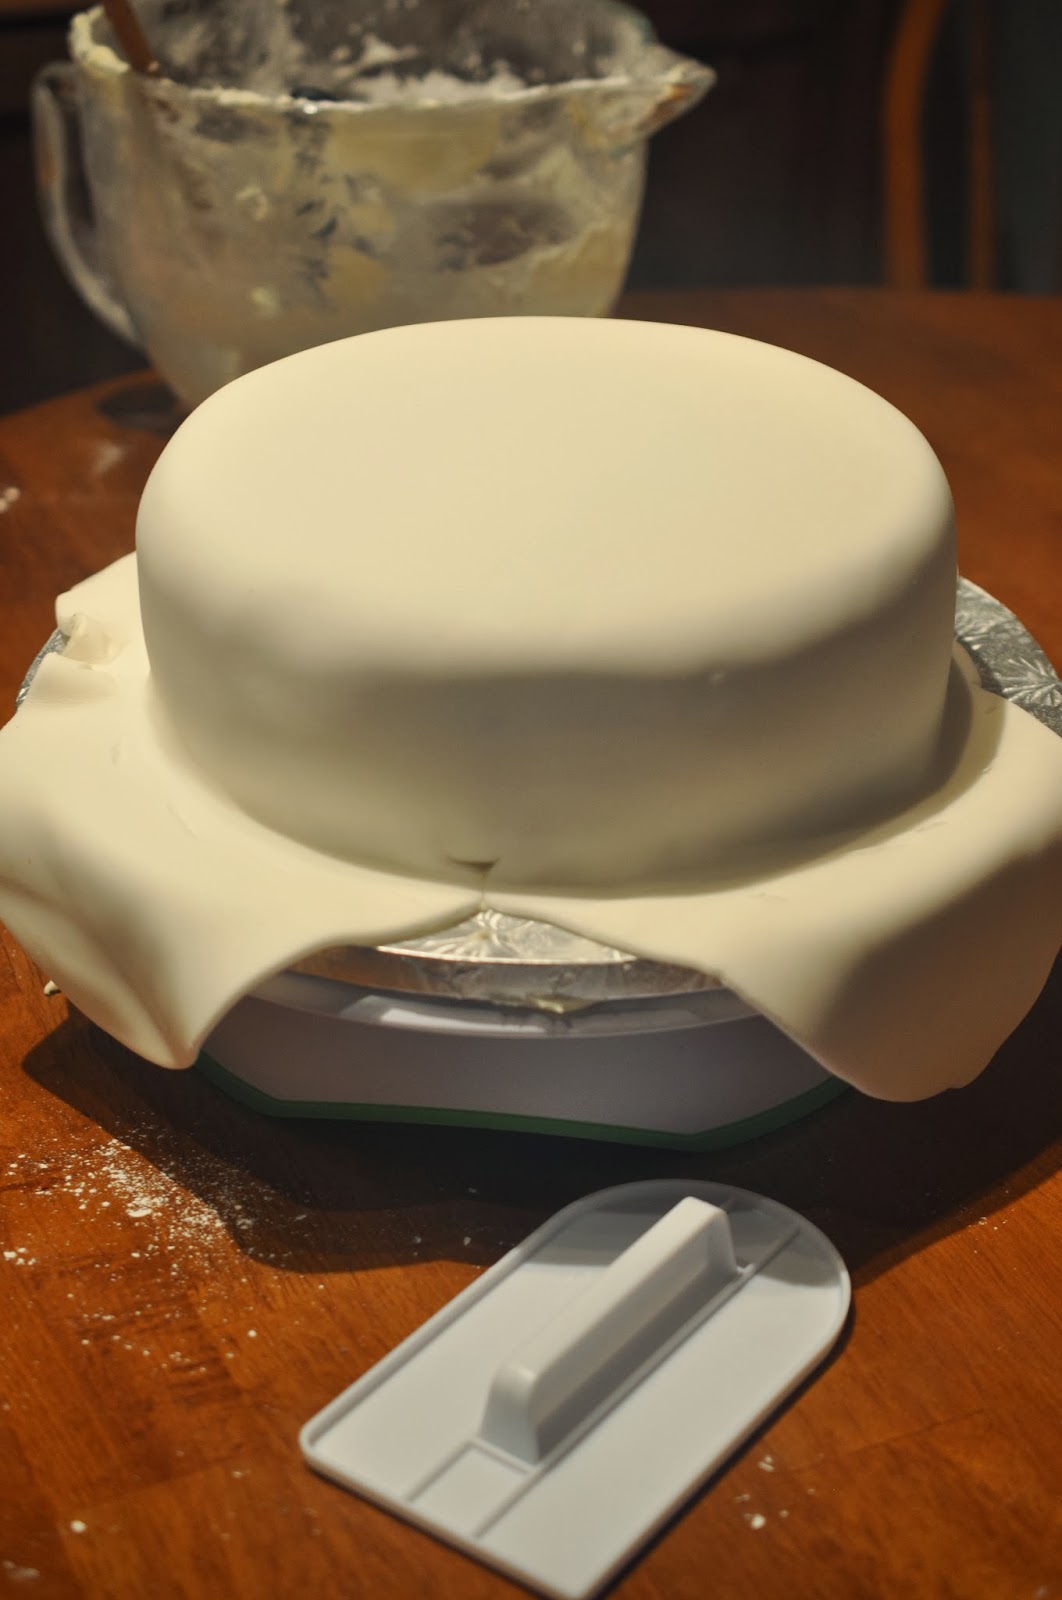
I used Wilton roll out fondant.  The white was perfect, and it's always a nice feeling when you don't have to colour 2lbs of fondant!!  But this time, there was no excuse to do this - snowy white was exactly what I wanted!


A little mistake with the top tier was I think my fondant wasn't thick enough.  The coverage on the bottom layer was definitely better than the top, but oh well... There were decorations to come!

 
... Lots of them!!
 
 
A couple of days earlier I made all of the fondant decorations, not only to save time on cake baking day, but also to let them harden up a little.  This meant the shape, for example on the skis would hold once placed and attached to the cake.  The nice thing about the fondant is it's not too hard to eat!  ... Sugar highs here we all come!

One of my favourite pieces on the cake was the curling stone.  A nice big fat round of grey, and then a Canadian red for the handle!  I wedged a little piece of paper under the handle for the couple of days after making it, to make sure the handle could support itself when the royal icing I attached it with set.


Another feature that just had to make it onto the cake were the skis with 'Go Lenny Go' written on in edible pen.  Jonathan's cousin Lenny is racing for Canada in the cross-country skiing team, so we're all pretty much the MOST excited for him... this was just a little shout out to him as the 2014 games begin!  #TeamLenny :)
 

Aren't the Winter Olympics just great?!  Full of some really great sports... Hockey of course had to make an appearance! 

Here are 2 skates I create with fondant coloured black, grey toe parts to the skate, royal icing laces and a blue fondant star for decoration on the back of each skate.


You can't really see the blade part of the skate, but it is there - they're not just walking boots I promise!
 
 
And where would hockey skates be without a stick and puck?!... This was one of the decorations I was most nervous about.  How to make the hockey stick NOT look like a golf club!?  I went with a retro looking wooden stick, and even taped it up to try and make it definitely hockey.  And a nice and easy round piece for the puck!


The next bit, the Olympic Rings were perhaps the hardest and most frustrating part of the cake.  I coloured the fondant icing into the appropriate colours, and then used my Wilton fondant press, with the circle plate insert inside to create perfect lengths of tubing.  I then connected the blue, black and red ends together to form a circle.  The green and yellow were much harder as I tried to be accurate and realistic with the overlapping/interlocking in the right places.  I had a hard time with the green one (and it was my least favourite part of the cake because I knew the mistake was there!) but royal icing helped me out and it wasn't too noticeably faulty!  Just a bit more icing holding it together than I would have liked, but apart from that - the rings were as they should be.


And let's not forget the compulsory red maple leaf to represent Canada on top of the cake here!  The space on the right hand side of the top cake was intentional - that's where the candles went :-)


And as you've seen by now, I surrounded each bottom of the cake with snowballs.  I had made SO many of these on fondant day, all in different sizes that it made it much easier to finish up the cake on the day, just sticking them to the cake board with royal icing to make sure they stuck down!

 
This cake was SO fun to make, I really love creating decoration pieces out of fondant, and had a great time putting them together.  And it also made cake day less stressful.  After baking and icing the cake, all that was left to do was decide where everything went, and just ... well, do it!  Sticking everything down, and then voila.  It was done! 
 
Finished on Saturday night, and taken to the Superbowl party on Sunday afternoon where Jonathan's family would all be, helping him celebrate his birthday - even if it was a day early... And anyhow, we're still eating cake leftovers right now too... Problem is, I can't decide which my favourite flavour is... Which was yours?!  ... Or perhaps I should say, which would yours be?!


I made a bottom layer of Red Velvet which you can get the recipe for here, but here's the almond cake recipe - I kind of adapted a usual plain sponge recipe as I went along!  This was for a 6" Spring form pan.

Ingredients:

6oz self-raising flour (minus 3 tbsp)
6oz granulated sugar
6oz unsalted butter
3 eggs
3 tbsp ground almonds
1.5 teaspoons almond extract

Method:

1.  Preheat the oven to 350°F and grease and line a 6" Springform pan with parchment paper.
2.  Cream together the butter and sugar until light and fluffy.


3.  Add eggs one at a time, beating well between each addition.

 
4.  Add the almond extract.
5.  Weigh out flour, but then substitute 3 tbsp of the flour for the 3 tbsp ground almond.
6.  Add flour and beat together until combined.


7.  Spoon the batter in the prepared pan and place in the centre of the oven and bake for at least 50 minutes.  Checking on the cake as you go - the top will likely get a golden brown colour, but the most important test is the skewer/toothpick test - the cake is cooked when the skewer comes out clean.

Baking in the deep pan did mean for a REALLY long cooking time, and if it wasn't the top tier, I would have definitely chosen to do it in two sandwich tins instead.  But, it did get cooked all the way through, I just had to keep checking on it!
 
I hope you get to try either the Red Velvet or Almond cake in some of your baking you do soon! 
 
And of course, enjoy the 2014 Winter Olympics!


*** My blog is 1 year old ***
 
Look back at what I wrote 1 year ago today!