Sunday, 28 July 2013

Summer Bash Nautical Cake

Whew what a busy day!  I can't believe it's the end of the weekend already and I'm only just getting this written... And that camping food post I promised, oops still not got around to that yet... all in good time!

Yesterday we had a super fun family celebration with my husband's family, cousins, 2nd cousins and family friends etc all up north in cottage country celebrating by the lake.  Lots of family, food and fun for everyone and as soon as the email came around asking who wanted what food contribution I jumped right into the cake slot :-)

May I introduce my 2013 Summer Bash Nautical Themed Cake:  Earl Grey Tea Cake with Orange Buttercream and Marzipan and Fondant decoration...


Last year I made my Summer Citrus Cake - lots of lemon with pretty citrus slices to decorate so this year I thought I'd go a different route.  And I did ... completely differently!
I LOVE to bake and decorate with fondant, however many family members don't like the taste of fondant, and I know on a hot day that a heavy cake with sticky fondant perhaps isn't what you want to eat.  Instead I went with marzipan to top the cake - a favourite with all of my Estonian in-laws!

As I've mentioned before, I love the chance to try something new, and although usually I don't try out a recipe before baking for an event (I know I should :-S) - I just hope for the best... this time I was putting together some recipes and some flavour combinations that I hadn't come across before so this time was an exception for me.

Late last Saturday night I baked a batch of Earl Grey tea cupcakes, added an orange buttercream layer and placed a round of marzipan and candy lemon on top to decorate!  This was the recipe I wanted... A few tweaks for the actual cake, but I am so grateful to The Gingered Whisk for the basic recipe I used, it was great!


With about 50 people at the party I thought I would go for a full 9" cake and am so excited that we hardly came home with any!  (Jonathan perhaps isn't as pleased about that!).  I love the flavour combination of the tea and the orange, and then the orange and the marzipan too.  Not giving up fondant completely I did the fun parts with fondant, setting the nautical theme with an anchor, rope, sail boats with a buttercream pearl border for the sea (or lake!).

There are some definite parts I wish had been better, neater etc but pretty pleased overall.  I wish in hindsight I didn't overlap the rope and cut it flush together at the back of the cake... I wish my royal icing glue was not as visible... I wish the sides of the cake were straight so the ships would lay flat on the marzipan... But apart from that, the taste was yummy (best with a bite of buttercream and cake at the same time) I think, I hope!

Here's the recipe - I'd definitely recommend it and it was dense enough to decorate over and lasted all day with nothing collapsing!!  (Something I was worried about on the drive up there :-S!)

Ingredients for the Cake:

1 cup unsalted butter, room temperature
2 cups sugar
3 eggs
3 cups flour
4 1/2 tsp baking powder
1 1/4 tsp salt
1 cup milk I used 3.25% whole milk
4 tbsp loose earl grey tea I used Teaopia's Lady Earl Grey which had slightly more lemon as well, more citrus yey!  Just what I had in the cupboard :-)
1 tsp vanilla

Method:

1.  Preheat the oven to 350°F
2.  Prepare two 9" sandwich cake tins.  Butter the tins, place a circle of parchment paper at the bottom, butter that and then flour the sides - shaking off the excess.
 3.  Grind the tea - with a mortar and pestle/food processor - or like me I used a coffee grinder that has yet to be used for coffee!  Not quite to a powder but don't leave any bits too big!


4.  In a small saucepan, scald your milk until almost simmering - turn the heat off and add the tea.  Steep while you prepare the cake.


5.  In a large bowl, cream together the butter and sugar until light and fluffy.
6.  Add the eggs one at a time, mixing well between each addition and add the vanilla.
7.  In a separate bowl, whisk together the flour, baking powder and salt.
8.  Add the flour mixture to the butter mix in 3 additions, beginning and ending with the flour.  
9.  Take out 1 1/2 tablespoons of the steeped tea leaves but add rest of the milk and tea mixture to the mix and stir until just combined.  
10.  Add the remaining dry ingredients and mix until combined - don't overstir!
11.  Divide the batter between the two pans, and bake for 30-35 minutes.
12.  When a cake tester comes out clean remove the cakes from the oven and cool in the tins for 10 minutes in the pan and then turn out on to a wire rack.  Cool completely before frosting.

Ingredients for the Orange Buttercream:

8 cups icing sugar (powdered sugar)
1 cup unsalted butter, room temperature
1/2 cup milk
2 tsp vanilla
1 tablespoon orange juice
2 tablespoons orange zest

Method:

1.  In a large bowl, mix together the butter, orange zest and vanilla extract until all lumps are gone.
2.  Add the milk and slowly mix until incorporated.
3.  Slowly add about 1/2 cup icing sugar at a time mixing on a low speed.
4.  Once all the icing sugar is in, cream on high for 2 minutes.
5.  Mix in the orange juice.

I sandwiched the cakes and filled them with buttercream.  Once filled, I frosted the outside of the cake and then added a circle of marzipan to the top of the cake, and then also places the sides of marzipan around the edge.


I piped the pearl border (my first time trying this!) with blue vanilla buttercream, and then placed all of the fondant decorations I had created while the cake cooled.  


For the anchor I used a large cookie cutter I bought a couple of months ago... I searched EVERYWHERE for a smaller version too, but nowhere to be found in this exact shape.  I'll have to order online for next time.  I cut out the star hole at the top with a star icing puncher I have from Wilton.


A small boat cookie cutter I do have!  Then I cut out a triangle of white fondant, and then with the same star cutter placed a red star on each sail.


And the part I was pretty excited about - the rope!  I rolled out two long sausages of brown fondant and braided them together - just a simple one over the other! 

I definitely ran out of photos at this point, oops!  Hopefully the finished look gives you an idea of how I created the ships, anchor and rope!


Hope everyone is having a great Summer so far!  I'm off to England tomorrow (wahoo!) for a quick visit to see my family... Maybe there will be some time to catch up on some posts at the airport, but we'll see!  Ciao for now :-)

Saturday, 20 July 2013

Celebrate with Cake Part 2!

So it has been officially 6 months since Sew Lah Tea Dough became public!  In January this year I began working on old posts, recipes and cake decorating that I had done before 2013 began... Once I had a bank of posts and a good first one to post I thought it was about time to let the world know!  It was something I had wanted to try for a long time - I had unsuccessfully tried a Tumblr, and the website I pay for (albeit for something a little different) has still not been used.  This meant I was not sure at all how 'blogging' would go!  Only since the onset of Pinterest had I been able to find blogs that I really loved to read - family blogs, crafting blogs, foodie blogs and music education blogs in particular... this inspired me to create one for everything I loved to do as well.


And Sew Lah Tea Dough was born!  As you see in my 'About Me' section - my blog name covers all that I love to do, and believe me - 'doing' is what I love.  I hate to be bored and love to be busy, all the time!  And why Sew Lah Tea Dough?...

Sew ~ a needle pulling thread ♫ Showcasing my handmade sewing projects crafts.  I always hated sewing when I was little - my Mum definitely helped with ALL my Textile projects at school, but last year for my birthday I bought a sewing machine and since then have loved creating clothes, little crafts, and gifts, and while I am no pro I do enjoy it, and it definitely teaches me patience!


Lah ~ a note to follow sew ♫  I'm a piano teacher and musician and I love love LOVE to make my students' lessons the most fun, with games and activities that inspire them in their musical learning and hopefully will instill a life long love for music not only in their piano lessons.  I'm working on creating my own worksheets and have a few free pdf printables now up on the blog, as well as showing you my music based crafts and foods!


Tea ~ a drink with jam and bread ♫ I am English after all!  I moved to Toronto, Canada in 2009 but I'm British through and through.  I might say 'stand in line' or 'garbage' by accident sometimes but I love crumpets, tea, Coronation Street and roast dinners so there is lots of British based baking, making, and crafting here.


Dough ~ that will bring us back to dough! ♫  And for me, it always comes back to the baking :-)  Baking is my most favourite thing to do!  It always has been.  I love to decorate cakes, I love to bake and try new recipes, I love to bake at every opportunity to take a gift/platter along, I love to think of new ideas and wish that I could do it all day long!

So that is why I'm celebrating with cake!!  6 cakes for 6 months.  Last week in Celebrate with Cake Part 1 I talked about 6 cakes I have recently made for various celebrations.  Click to see what they were and how I made them :-)
Today it's a bit more writing than usual, but if we're lucky (and I can write quickly) this weekend there will be a bonus post talking about some camping food from our trip to Algonquin Park this week :-)

So, in the spirit of 6 months - here are 6 things I've learnt or been proud of in these first 6 months of blogging.


The pictures on the right show some popular ones!  My Quiet Book was the first thing to be repinned a lot more than any others!  Yey!  The DIY Herb Garden was featured not only on Pinterest but on Buzzfeed, wooooooo!  My Superbowl cake for my husband's birthday is my particular favourite cake of the year - and my most challenging to make!  And finally the DIY bow tie onesie, although just a recent post has been making my stats go crazy!  Mainly through Pinterest, but also from some awesome features on great link parties :-)  Thanks everyone!!

And now, 6 things still to come, some aims and things I still want to do with this blog - hopefully in the next 6 months.


I am so excited to be part of the blogging world, but I know there is a lot more to learn, to aim for and to keep going with!  Compared to some of the incredible bloggers I read and follow I am such a newbie to all of this and know I am still learning, and there are probably lots more things I could be doing better.

But for now I am happy with how things are and what I have achieved.  Whether I blog or not, I'll be baking, sewing, and musicking and I hope that never ends!!  

For now, it's just carry on as usual and hopefully achieve those 6 aims above in the next 6 months :-D

Stay tuned for posts on those sneak peeks I showed you in those pictures (a pretty fabric, elephant tutorial and Doctor Who themed posts coming soon!).  Can't wait to share more with you!

Next up is our camping adventures and the food we ate of course!  I do love food after all!

Have a great weekend everyone, and thanks for reading the past 6 months, so happy to have you all checking out my blog :-)


Saturday, 13 July 2013

Celebrate with Cake!

It's time to celebrate!

And what better way to celebrate than with cake?!


This week I am super excited to be celebrating 6 months of my blogging life :-)  That is 6 months since I started this blog, writing weekly posts, sharing my projects at some amazing link parties, being featured on some incredible sites and really learning a LOT about the blogging world and how to do it better!

There are some things in particular I am really proud of and some projects that have had some really kind and positive feedback on and so I wanted to share my celebrations with some cake!

These are some cakes I have made (and eaten) recently and haven't had the chance to post about, so I thought - why not put them all together and have one big feast of 6 cakes for 6 months!

Today I'll be sharing a few more photos and info about the 6 cakes featured today in my celebration of cakes, and next week it'll be Celebrate with Cakes Part 2 - all about 6 months of blogging.  6 things I'm proud of or have learnt, and 6 aims and ideas I have for the next 6 months!

So here are the 6 cakes in a little more detail:

1.  Summer Cake ~  Lemon sponge cake, with a raspberry jam and butter cream filling, decorated with white fondant and buttercream piped grass, topped with fondant flowers and butterflies.


This was the second time I made a cake for my choir's silent auction.  We were raising funds for the choir to go to Festival 500 in Newfoundland - and they just got back!  Check out their flash mob in Avalon Mall - so fun...I was really sad to miss it!


I was super happy that the winning bid on the cake went to a choir member's Mum whose birthday it was the next day!  Ready made birthday cake :-)  I hope she enjoyed it!!

2.  Mini farm cupcakes ~  A lot of you have seen the Quiet Book I made for a special little 2 year old's birthday this year (click here if you haven't!), and these are the edible gift we took along as well!  She enjoyed a super fun morning at the farm - on a 'Rise and Shine' theme, with breakfast served for the guests in the barn - what an amazing idea!  Sadly I had to miss the party (REALLY SADLY as I LOVE the farm, like really love!) but we did get to spend the afternoon and evening with our friends, celebrating the birthday girl and hanging out in the sunshine!


Seeing as she enjoyed a farm party, I made some mini lemon cupcakes and frosted them with piped 'grass' buttercream.  The cupcake toppers were rolled out fondant which I cut out with my mini animal cookie cutters that I usually use for Easter!  A baby pig, bunny rabbit and chick, as well as some little flowers, and the same butterfly you also see on the Summer cake.


3.  Banana Loaf ~  This is the most recent of all of these cakes, having just been made this week!  A few bananas left over, and me missing baking (it had been at least 2 weeks of no baking!!!!!  VERY unusual) meant it was time to try something different.

Jonathan's family just returned from their 2 week vacation, so we bought them a few groceries and left them with this little homemade treat to welcome them home :-)


Oh yes of course there were a couple of cupcakes baked too, we couldn't give them the whole thing without trying it ourselves!  It was a recipe I hadn't tried before as well so it was good to check it out (hehe)...and confirmed...it was yummy!  Thank you Mary Berry via Queen of Everything for the recipe inspiration!


Something I had thought of when first thinking of making the banana loaf was the banana embellishment!  I sliced up the extra banana I had, and laid it on top of the batter just before putting it in the oven.  I was not sure how this would turn out, and about half way through cooking was worried they were sinking - but the batter rose, and pushed up the banana slices with it and it turned out almost perfectly!  Yey...and phew!

4.  Trio of mini cupcakes ~  Did anybody notice I like lemon?  Again these mini cupcakes were lemon, this time with a vanilla buttercream frosting, piped in a couple of different ways.

But why a trio?!  Well we had a trio of celebrations in June.

First of all we were invited to Jonathan's cousins' church for his little cousin's baptism, and a celebratory bbq at their place afterwards!  He got the blue cupcakes with white fondant stars!


That same Sunday also happened to be Father's Day!  Hence the tie on these ones, with a smart black and white cupcake wrapper.


And the third and final celebration that day was Jonathan's Great-Aunt's birthday!  Pretty spring cupcake wrapper with flowers for her :-)


Whilst the cupcakes were made specifically with those celebrating in mind, we did all get to share and eat them!

5.  Brown Sugar and Coffee Muffins ~ This is another set of mini cupcakes, but with a recipe that I have been meaning to try for a LONG time now!

I baked these cupcakes for a church lunch event, and figured, why not make mini ones, more cakes this way even if they were smaller.  But at these church events - desserts are not sparse!


I found this recipe on Pinterest a long time ago... I loved the sound of the brown sugar muffins, and the coffee/icing sugar glaze on top.  Here's where it originally came from (just click!), and oh how I wish my glaze looked as pretty as hers did!

6.  English Country Garden Cupcakes ~ Well I couldn't make a cake for my choir auction, without baking something for the choir to enjoy after the concert!  We had worked hard after all!?


I gave them a taste of what the silent auction cake was, with a lemon cupcake and the same grass buttercream, with flowers and butterflies to top them off.

We all enjoyed them at our post-concert dinner/pub trip ♫


So here it is, the start of my week of celebrating 6 months of blogging!

I hope you can join me next week and read all about the 6 things I have learnt and enjoyed in 6 months of blogging, as well as the next 6 aims I have for Sew Lah Tea Dough :-)  I'm excited for the next six months and what it will bring!!

Saturday, 6 July 2013

Bow ties are cool... Baby bow ties are cooler...

... and cuter too!

Nearly 8 weeks ago I blogged about the new baby boy elephant cupcakes and custom baby boy onesies I made for the arrival of a sweet baby boy - a very cute and squishy addition to our friends' family.  Wow 8 weeks!?  Seems like a long time already for this little baby, which means I think it is definitely time I blogged more about the custom onesies I made, just as I promised.

When I first blogged about the onesies I was so thrilled with everybody's kind words and compliments, and especially excited to see, that just like me - everyone's favourite seemed to be the bow tie onesie!  Yey!  I'm still so happy with how it turned out, and I love that everyone else did too - thank you for your comments and repins :-)


So today I bring you the tutorial for the bow tie onesies.  I'll share what I did and also what I plan on differently next time - I'm wondering if these might make it onto my Etsy shop.  Right now you'll just see my moustache hair clips/men's bow ties/lapel pins so it's pretty lonely on the Sew Lah Tea Dough Etsy shop so maybe these will get there soon.  What do you think?  Would these be something that catch your eye while browsing Etsy?

Firstly I purchased a white onesie (this one was a size 6-12months, thinking he could grow into his 'smart suit' in a few months time!).  I chose white to act like a smart white dress shirt :-)

I knew that I wanted to create 2 bow ties so that the colours/patterns could be interchangeable... and then to find a way to attach the bow ties, meaning that I could make future bow ties with the same fixings on for endless possibilities.  That means everything you'll see will be twice over as I made 2 bow ties but the measurements I give will be for 1.

So here goes.  I chose some really cute and soft flannel fabric I got in JoAnn's on my most recent US trip.  I knew a baby was coming so this definitely inspired the purchase, and it worked perfectly for the bow ties - I love the fabric design and thought it was so appropriate for a baby boy.  Thank you JoAnn's!

1.  Start with 1 rectangle of fabric cut to 9" x 4" and 1 smaller piece cut to 2.5" x 1.5".

2.  Fold right sides in lengthwise and pin.  These are the top edges you are going to sew shut.


3.  Machine sew in a similar colour thread (I used white) along the pinned top edges.  (As these aren't huge projects they are probably something that could be hand sewn as well if you don't have access to a machine)


5.  Turn the fabric inside out so that the right side is now showing and admire your pretty baby fabric you chose :-)


You will then have tubes of fabric, one big long rectangle that will be the main part of the bow tie, and the smaller one that will be the wrap around middle part.

6.  Turn the seam so that it sits in the middle of the back and iron flat.


7.  Working first with the large rectangle, fold the 2 ends towards the middle.  I actually overlapped one side more so than the other - I figured if it was going to be on show then having only 1 edge visible would be better than 2!  And also once I wrapped around the smaller rectangle this would then go around both edges potentially making it more secure.


8.  Tack down this middle overlap just to attach them together which will make it easier to work with when you add the small middle band.

9.  Squeeze together the middle of the bow tie and aim for nice symmetrical pleats for the bow tie effect!  I was really happy with how one came out, and the other didn't do as nice of a pleat but that's okay!  


10.  Oopsie that may have been my last photo.  Luckily it's almost the final step, and finally time to use that small rectangle that was oh so fiddly to turn right side out!   Take this rectangle tube and fold around the middle of the bow tie.  Hand sew together at the back.  I sewed through the 2 edges, but also made sure that some stitches went through the actual bow tie so that it would move side-to-side.

Time to attach the velcro or whatever you want to use to get this bow tie to stay on your little one's outfit!

11.  I had chosen to use velcro squares - with two attached to the onesie just underneath the collar spaced apart based on your bow tie - just double check and make a mark where you want them to be sewn on!  This meant I needed the opposite sides of velcro squares to attach to the back of the bow ties.  I'm afraid I don't have a photo of the back (and right now I'm saying to myself "why was I so silly not to take one of the back side?!")... but I attached a square to the under side of the bow tie - one on each side of the bow.  Hand sewing the velcro was tough!  I really appreciate usually being able to use a machine for this! 


I am sure there would be a way of figuring out which part would eventually be this velcro section and attach it first, but I haven't got there yet.

All done!  2 cute and soft bow ties ready for the outfit and the new baby (who, at the time of finishing the gift was still warm and cosy and not born yet!)


My other idea which I think I would use as another option if I made these more often, for more flexibility would be to attach small bar pins either by sewing them on, or hot glueing them down so that the bow tie could be attached to any outfit.  

But for this time I wanted the two interchangeable bow ties for 2 outfits in one, so went with velcro not only for easy attaching, but also meaning the bow tie could be removed so the outfit could still be washed... Very necessary I think :-)

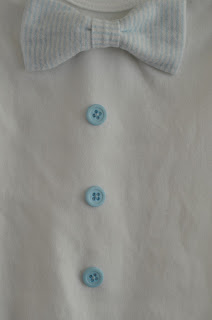
I also should mention, that I chose to make the onesie even smarter with some pale blue buttons sewn down the centre of the onesie.  That's totally optional - but I definitely think it adds a nice contrast in colour to the white fabric as well as being nice and fancy to make your little one look so grown up!


I love these bow ties!  And have lots of material left, and can't wait for a chance to make some more.  Looking forward to when the new little one is big enough to fit into the outfit and we can see him looking super dapper ♥


This final photo is just as I was packing everything up.  Don't you love the 'Stitched with ♥' ribbon!?  It was a super exciting little gift from my Mum sent from England.  Just had to use a little of it for this present :-)  Thanks Mum!

I'm so glad I've finally posted this tutorial - I hope you have a chance to create a cute little bow tie for your little man.  I loved coming up with this onesie - accessories for baby boys are definitely not as easy to come up with as little girls' but I did really enjoy this project :-)  

Definitely going to make some more, and I'd love to hear what you think - do you reckon they'd make for a good Etsy sell!?  And do send me your pics if you make some of your own!

Have a great week everyone!