Showing posts with label crafting. Show all posts

Monday, 6 October 2014

DIY Baby Burp Cloths

 
Not a baking post!  Who knew!?  ... Baking for me has that has to happen that weekend, or for that particular event feeling as well as being a consumable that obviously makes it delicious enough to want to do immediately!  But then all my ideas for sewing projects and things I want to craft and make get put on a list in my head and wait until everything else is done which means I often don't get around to it!
 
BUT this week, with a bunch of important and necessary to-do list things checked off the list, I finally got around to getting out my sewing machine and getting to work on these nice and easy baby burp cloths I had been wanting to make since I found this variety of super cute flannel fabric at Fabricland a good few months ago!
 
Expecting an Autumn baby, the colours and the designs are perfect for our soon to arrive little one (or perhaps...already arrived by the time this post goes live!?) and burp cloths were something we didn't have yet.
 
It was a nice and easy project to start with... We don't know the gender yet, so sewing clothes will have to wait until he or she is born, so I thought I'd start simply.  I bought some soft white flannel to back the cloths with, contrasting against the fun flannel prints I had found in the 'quarters' section. 
 
If I'd been in the States, I'd have been able to do this for even cheaper!  So at trip to JoAnns might be necessary soon for more baby related projects :-)
 
So with pre-washing fabrics done, I was ready to start... These cloths could be made with any design of fabric, to any size you desire - and don't have to be flannel like mine were, but I personally LOVE flannel so chose to do both the front and back in that, but I might also try something with more of a terry cloth backing to it as well perhaps.  But, I'll share the way I made mine, with my dimensions and the way it worked out!
 
1.  Select your fabric to make the cloths and pre-wash and iron before starting to cut and sew.

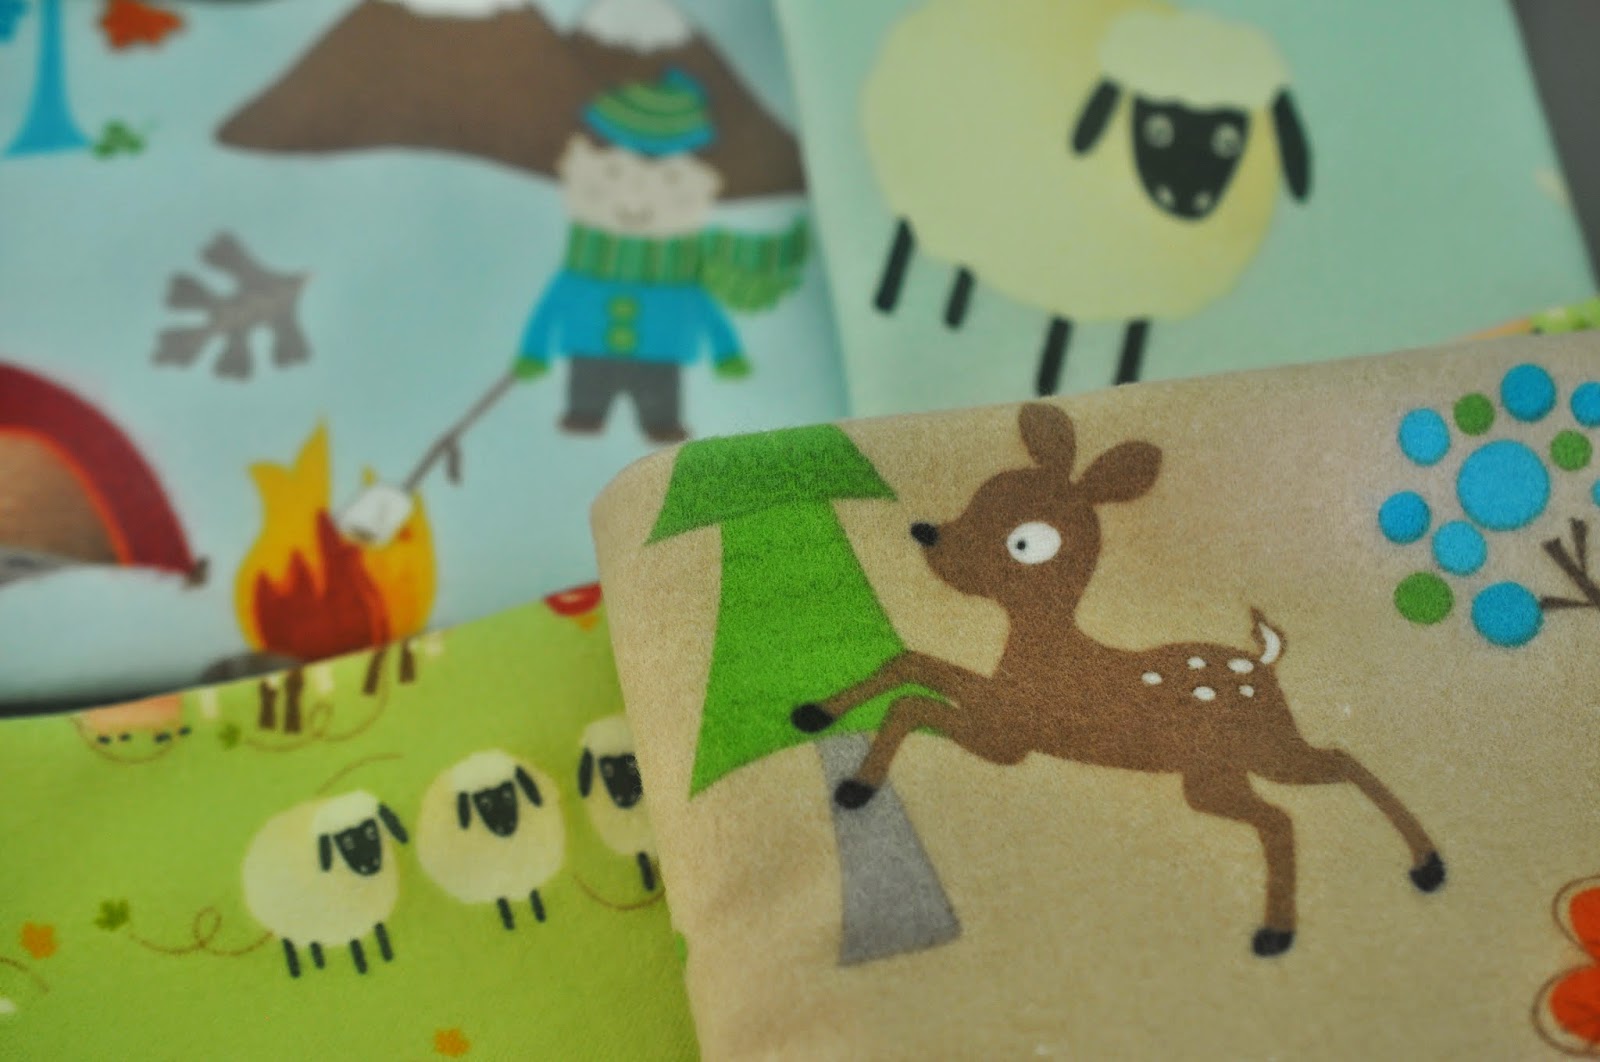
2.  I chose 4 designs of flannel prints for my burp cloths, a large print animal, a small print animal and two camping designs in contrasting colours.
 
 
3.  Cut fabric into a rectangle by 17 x 10 inches.  

 
4.  Cut backing fabric (white flannel) into the same rectangle shape - 17 x 10 inches.


5.  Taking a printed flannel piece, and a white backing flannel piece - put right sides together and pin around the edge, leaving a seam allowance around the edge. 

 
6.  Make sure to leave a gap of around 2 - 3 inches somewhere along the pinned edge so when it has been sewn, you can turn it back with right sides out.  I chose to do this at the bottom short edge of the rectangle - thinking it would be the least noticeable part of the cloth, and wouldn't mean for any awkwardness in sewing the corners of the cloth!


7.  Back stitch a little at the start of where you sew, and the end - just to make sure no stitching comes apart when you turn it right sides out.
 
 
8.  Once you have sewn all around where you have pinned (I chose white thread to go with the white flannel backing), cut the corners of the cloths to give them a nice corner when you turn them right sides out.


9.  Turn the cloth right sides out through the gap left at the bottom of the cloth.  I use a chopstick to poke to corners out as much and as neatly as they can.


10.  Iron the burp cloths flat, making sure to press the open area in as if it was also stitched!


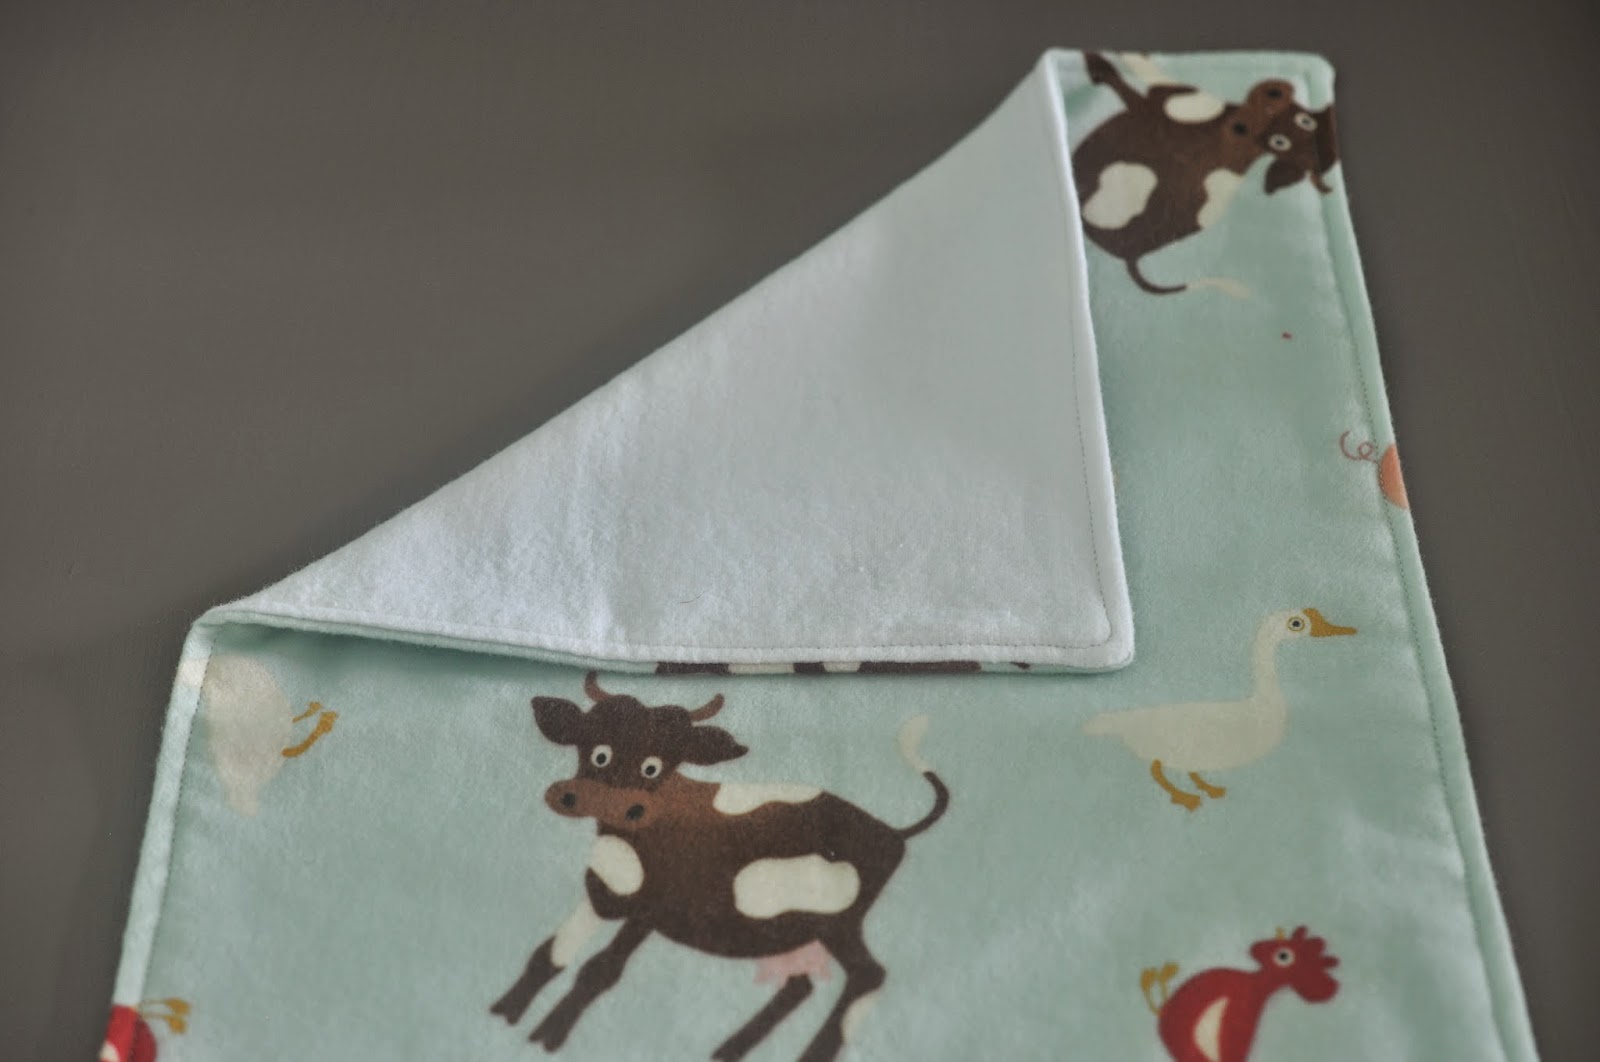
11.  Nicely pressed, now go around the edge of the cloth top-stitching all the way around.  I used a white thread again, but you could also go with a contrasting but complementary colour to your fabric to make it stand out intentionally!  Stay closer to the edge of the cloth than your seam allowance was, it gives the cloths a really nice finished edge. ... And yup, that's it!  Cloths finished!

 
As I had the four designs of flannel print, I did all four cloths at the same time - but could have easily made more in that same window of time.  The part that takes the most time is the cutting out (at least for me it did), but I'm glad that I did all four cutting out, pinning and then I could just whizz around the edges with the machine of all four, iron all four, and then top stitch all four all at once but this could easily be more without adding much more time!
 
Not too difficult at all, good for me - having not done much sewing recently (with our sewing machine packed up in a box before we moved, not being able to do any crafting while we tried to sell our home!) so I'd definitely recommend whipping a few of these up - they'd make great gifts for a new baby or for yourself like I did! :-D


Burp cloth photo shoot time of course! 
 
Before I cut these out (which was half of the fabric I had in these designs), I checked they would be a good size for placing over a shoulder, for both me and my husband but I'm sure they'll be used for all sorts in the near future!


I just can't decide which fabric design is my favourite!  They each have something I love about them!!  What do you think!?


Can't wait to use these when our little one arrives, and at least I'll always have these pictures of how clean and pressed they were... once upon a time!! 
 
Now to use the remaining fabric for each of the designs... Maybe some bibs using the same idea... Watch this space!

Monday, 11 November 2013

Bridal Shower Cupcakes ♥

I am super happy today to be blogging about 52 cupcakes I made this weekend for a special lady's bridal shower yesterday!  I'm a little late with the post, but was busy busy making and decorating these cupcakes, and then of course celebrating at the shower itself ♥
 
 
 But here it is, and I'm so happy with how they all turned out!
 
I was asked by my friend (sister and maid of honour to the bride) to make cupcakes for the brunch which would be a vintage, tea party type brunch at an amazing venue - perfect for this shower.  She and the other bridesmaids did an amazing job putting together all of the decorations, games and food which made it a really, really pretty and fun bridal shower!  I think the bride-to-be had a great time!
  
Mostly I am so happy to be asked to make these for the shower.  It is the first time I have had the chance to bake SO many cupcakes for one event and was given a little inspiration from this picture which the sister and maid-of-honour showed me, giving me the idea of how the event would look and the ideas that they were having!
Cupcakes in Lace
So of course, I got to work in my brain, planning out lots of different ideas, thinking about how I could make this work - in a Sew Lah Tea Dough way!  I didn't want to fully recreate these cupcakes, but instead, put a personal spin on these as well as matching the bride, the party itself and everything I could to tie in my cupcakes to the shower.
 
The bridesmaids had made some really amazing brown paper invitations with ribbon and button embellishments, so that was a personal inspiration that I knew would be used in the shower itself. 
 
So two different designs were born... 1, a pretty in pink look with similar tags stuck in, with lace and pearl inspirations.  2, a button inspired vintage feel design.


At the family Summer bash in July I made this cake - a nautical themed Earl Grey Tea cake with Orange Buttercream.  This flavour was a hit with young and old and so this was the requested flavour for the bridal shower too :)  Super happy to get the chance to make this cake again but I changed it up just a little bit.  But how perfect, a tea flavoured cake for a Sunday Bridal Shower Brunch with pretty tea cups and saucers!  I chose to do a lemon buttercream this time to match the citrus flavours you can taste in Earl Grey tea.  I chose orange buttercream last time to tie the earl grey to the marzipan to the buttercream but this time there would be no marzipan, only the cake, fondant decorations on top of the buttercream, so I chose a slightly different flavour.  (Just happens to be my favourite hehe!).

Now you know the inspiration for the designs, and the flavour it's time for the photos :-)

Fondant day was first!  I wanted to get the cupcake decorations made and ready so that on baking day they would have hardened up, meaning they (hopefully) wouldn't go soft once they were placed on the buttercream.  (*It worked!*) ... and it also meant that they were made and done ahead of time, giving me the afternoon before the party to really work on getting them baked and decorated already knowing what would be placed on top ... all I had to decide was the colour combinations.

Here are my supplies for fondant day!  I was excited to use my new Wilton fabric silicone mould which included great button shapes.  I coloured the fondant with a variety of colours, some bright, some more muted, generally going for blues, teals, browns, purples and pinks trying to match the vintagey-feel.  I also used my heart punch for some little love accents which I used on a few of the cupcakes.


I really LOVE working with fondant, creating new shapes, colours and generally just playing around with it all :-)

And for the other design I had been busy working during the week before to create the tags to go on top of the pretty in pink pearl cupcake. 


I used the 'Love Letter TW' - typewriter font and printed out various text on pink card stock that I would use to cut out with my tag cutter!  I chose to use 'I do', 'bride-to-be', 'love' and 'l&r' (the bride and groom's initials).  I also cut out brown paper tags in the same size that I would back the pink ones with.

I used a toothpick in the middle, and glued the two together.  I also then used stick on pearls to decorate the tags.  I had edible pearls for the cakes so thought this would match well. 

 
Fondant toppers made and drying out... Tags all put together... Doilies cut and made to make the lace-look cupcake wrappers and I was ready to...... BAKE!


52 cupcakes were baked, and I had bought 2 huge cupcake boxes from the amazing Golda's Kitchen which would fit 48 (so I guess that left over a few for the boys happily watching football until clean up time :-P).

I used almost the same recipe as last time I baked these cupcakes and so you can find the step-by-step picture tutorial there, but I've also included the recipe at the end of this post - it is so delicious, hope you get to try it!

I used a 1A large open decorating tip for the button cupcakes which I decorated first.  I wanted to make sure the colour combinations were working and they would sit well on the buttercream before the evening got too late!  I chose to use three buttons on each in complementing colours.  Here they are - feeling happy at least half of the cupcakes had worked out and looked good!


Next up was a 1M star tip for a swirl of peach coloured buttercream, three edible pearls dropped into the swirl and then the tag stuck in the middle.  I LOVE how the doily cupcake wrap matched the pink pearl feel and can't wait to make more cupcakes that will need a pretty lacey doily wrap :)
 

By the end of the night, I was tired and hungry so there's a lack of pictures here, but I knew I had to wait for daylight to get some good photos of the cupcakes so I packed them away for the night!


Until the morning... photo shoot time ♥


Lacey love cupcakes photographed and back in their box...

 
Time for the buttons! 


Everything packed up ... 2 huge boxes full of cupcakes!  Time for a quick drive up to the shower keeping fingers crossed that no sudden stops had to be made!  It was the first time transporting so many, so I got scared and sat in the back seat with them... All was good (*phew*) and they arrived at the PRETTY bridal shower!  There were some really beautiful platters to put them on, and they sat beside scones, sandwiches, croissants, yummy quiche, kringel, other sweets and an awesome donut tower!
 
So happy to be a part of this special bridal shower ♥  Can't wait for the big day!


* Keep reading for the recipe below *
 
 
For the cake... I'll give you a recipe that will make 16 normal sized cupcakes.  I don't think everyone making this will always want to do 52!

Ingredients:

1/2 cup unsalted buter
1 cup sugar
1 1/2 cup flour
2 1/4 baking powder
1/2 tsp salt
2 eggs
1/2 cup whole milk
3 tbsp loose Earl Grey tea

Method:

1.  Preheat oven to 350°F and line cupcake tray with cupcake cases.
2.  Grind the loose leaf tea (using coffee grinder, food processor or by hand) until it is in smaller pieces, but not quite a powder. 
3.  In a small saucepan heat the milk and 1 tbsp of the ground tea - warm slightly.
4.  Remove the saucepan from the heat before it simmers and let it cool, allowing the tea to steep.
5.  While the milk cools, cream the butter and sugar together in a mixer until it is light and fluffy.
6.  Add the eggs one at a time, mixing well between each one.
7.  In a bowl, mix together the flour, baking powder, salt and rest of the tea.
8.  Add half of the dry mixture to the batter and stir until combined.
9.  Strain the milk from the saucepan (leaving the loose steeped tea) and add to the mixture.
10.  Add the remaining dry mixture and mix until all combined. 
11.  Divide the batter between the cupcake cases - I found that using a small OXO cookie scoop it took 3 scoops to make a perfect size of cupcake, just to a similar height as the edge of the cupcake liner.
12.  Bake for 20 minutes (until light and springy to the touch, and when a cake tester comes out clean).
13.  Leave to cool completely before frosting/decorating.

For the buttercream frosting, with enough to pipe at least 16-24 depending on the type of piping (and the rest will always keep a little while in the fridge if there are leftovers... just another excuse to bake more cupcakes!!)

Ingredients:

18oz icing sugar
12oz unsalted butter
1 tsp lemon extract
2 tbsp whole milk

Method:

1.  Beat sugar with the mixer until it is a little soft.
2.  Add icing sugar, extract and milk.
3.  Beat together until combined, soft and creamy.
4.  Pipe with a tip of your choice and decorate as desired!
 
Enjoy baking these delicious Earl Grey Tea cupcakes ♥
 
Let me know if you have any questions about the recipe :)

Sunday, 3 November 2013

Getting Crafty for a British-Canadian Wedding ♡

I'm so excited to be sharing this crafty project with you today as it's been in the works for a while now, but as it was a gift and I hadn't given it yet I couldn't spill the beans to anybody!

We had an amazing day on Friday celebrating the wedding of an old friend of mine from back home in England!  You might have seen the cakes I blogged about a couple of weeks ago - the Cherry Bakewells in my Taste of Britain series which were for her bridal shower... But then, the big day was here!  They had a beautiful wedding in an amazing venue and I was so happy to be a part of it.  Having a friend from England not so far away here in Canada is SO nice!  Especially fun was seeing her family who had made the trip across the pond who I also hadn't seen in a long long time.  It was such a special day, with delicious food and a lot of fun :)

So in thinking about their wedding day and their gift I thought there had to be something handmade there for them both, and what better theme than a little something British and a little something Canadian.

As I mentioned in my last post about the bride-to-be, I'm a big personal fan of British girl marrying Canadian boy ♡  So I thought I would use this in the DIY project for them both!

And so, the flag tea towel idea was born...


1 English flag, 1 Canadian flag and 1 more combining the two countries, just like their marriage would be!

For this project I was super excited to be able to use two different, and relatively new techniques that I've been playing around with in my crafting recently.

In August I treated myself to a pretty wooden box with 3 new X-acto knives in, for a different stencilling project.  This, along with Martha Stewart's roll of adhesive sticky-back stencil film and I was ready to roll! 

First to make the stencils... I downloaded some simple images of the flags from the internet, and just using Word I made sure they were the same size and printed them out.  I cut out the part that eventually would be painted in, firstly on only the paper just to make sure it all would look right before committing to the stencil film!


Trickier was creating the English cross of St. George/ Canada maple leaf combo flag!  I wanted them both to be identifiable without losing the flag idea.  Isn't it nice that both the English and Canadian flag are red?!  I opted for the English flag rather than the British one for that reason, as well as the simpler design - simpler in stencilling I think is more effective and way LESS risky - especially as it wasn't a project for me, but for a wedding gift.  It had to be perfect!


I cut out a separate leaf from a different print out and traced it on top of another English flag.  This gave me a better visual of how to cut it out.  I wanted the leaf to be in the centre, with the cross coming out from it.  With these both being red, there had to be a small amount of space between the two parts so it was a very careful cutting out job!


Then, with everything cut out and planned it was time to transfer those templates onto the adhesive stencil film.  It's so easy to cut out from, the only downside is the roll.  The previous project I did with the roll of film was cut out before using it as a stencil another day and I placed it between lots of heavy text books in between but this time it was an all day project and I had forgotten to do that.  Luckily it did flatten out over the couple of hours as I prepared everything before using the paint.  But next time I'll definitely make the stencils a day or two ahead of painting day just to make sure they're really flat and smooth.  But the adhesive does make it so easy to stick down and doesn't really allow for any bleeding which is just great!!


Stencils all cut out so it was show time!  Time for the real deal now.

I placed a sheet of bristol board on the floor and taped it down so it wouldn't move.  Then I taped the tea towel down and measured to see where the centre would be.  I chose to put the design in the bottom centre of the tea towel, so that if it was folded and was hanging, for example on the oven door the image would still be visible.


I used Tulip soft fabric paint which I have tried once before in black and loved the feel of it, and how easy it was to apply.  This time in crimson, poured out in a takeout container with my foam brush at the ready!

Easiest one first of course...


2 down, 1 to go...


Maybe leaving the hardest one to the end wasn't the best idea... I was nervous!


The biggest mistake I made in cutting these out was definitely not leaving enough room at the edge (seam allowance but without the sewing!) to allow for my brush to get close to the edge without going over.  I had to be TOO careful and could have avoided that pressure!

But luckily all went okay and then there were three!


I left them to dry for a few days (72 hours is the instruction on the paint tube!) and then washed them in warm water on a gentle cycle.  And then I dried them on a rack not in the tumble dryer.  Reading reviews about this paint it seems like it holds up pretty well.  Hope so anyway!  Do you have any experience with these Tulip soft fabric paints?!

So, all dry and ready to be packaged up... not without the obligatory photo shoot first!

For the bride the English flag...


For the Canadian groom...


And for the new husband and wife team


So the bonus wedding gift was all made, packaged on top of the oven-to-table set of dishes were the kitchen towels tied up with string!


All the best to the new happy couple
You had a beautiful wedding and it was so special to be a part of  it, thank you!